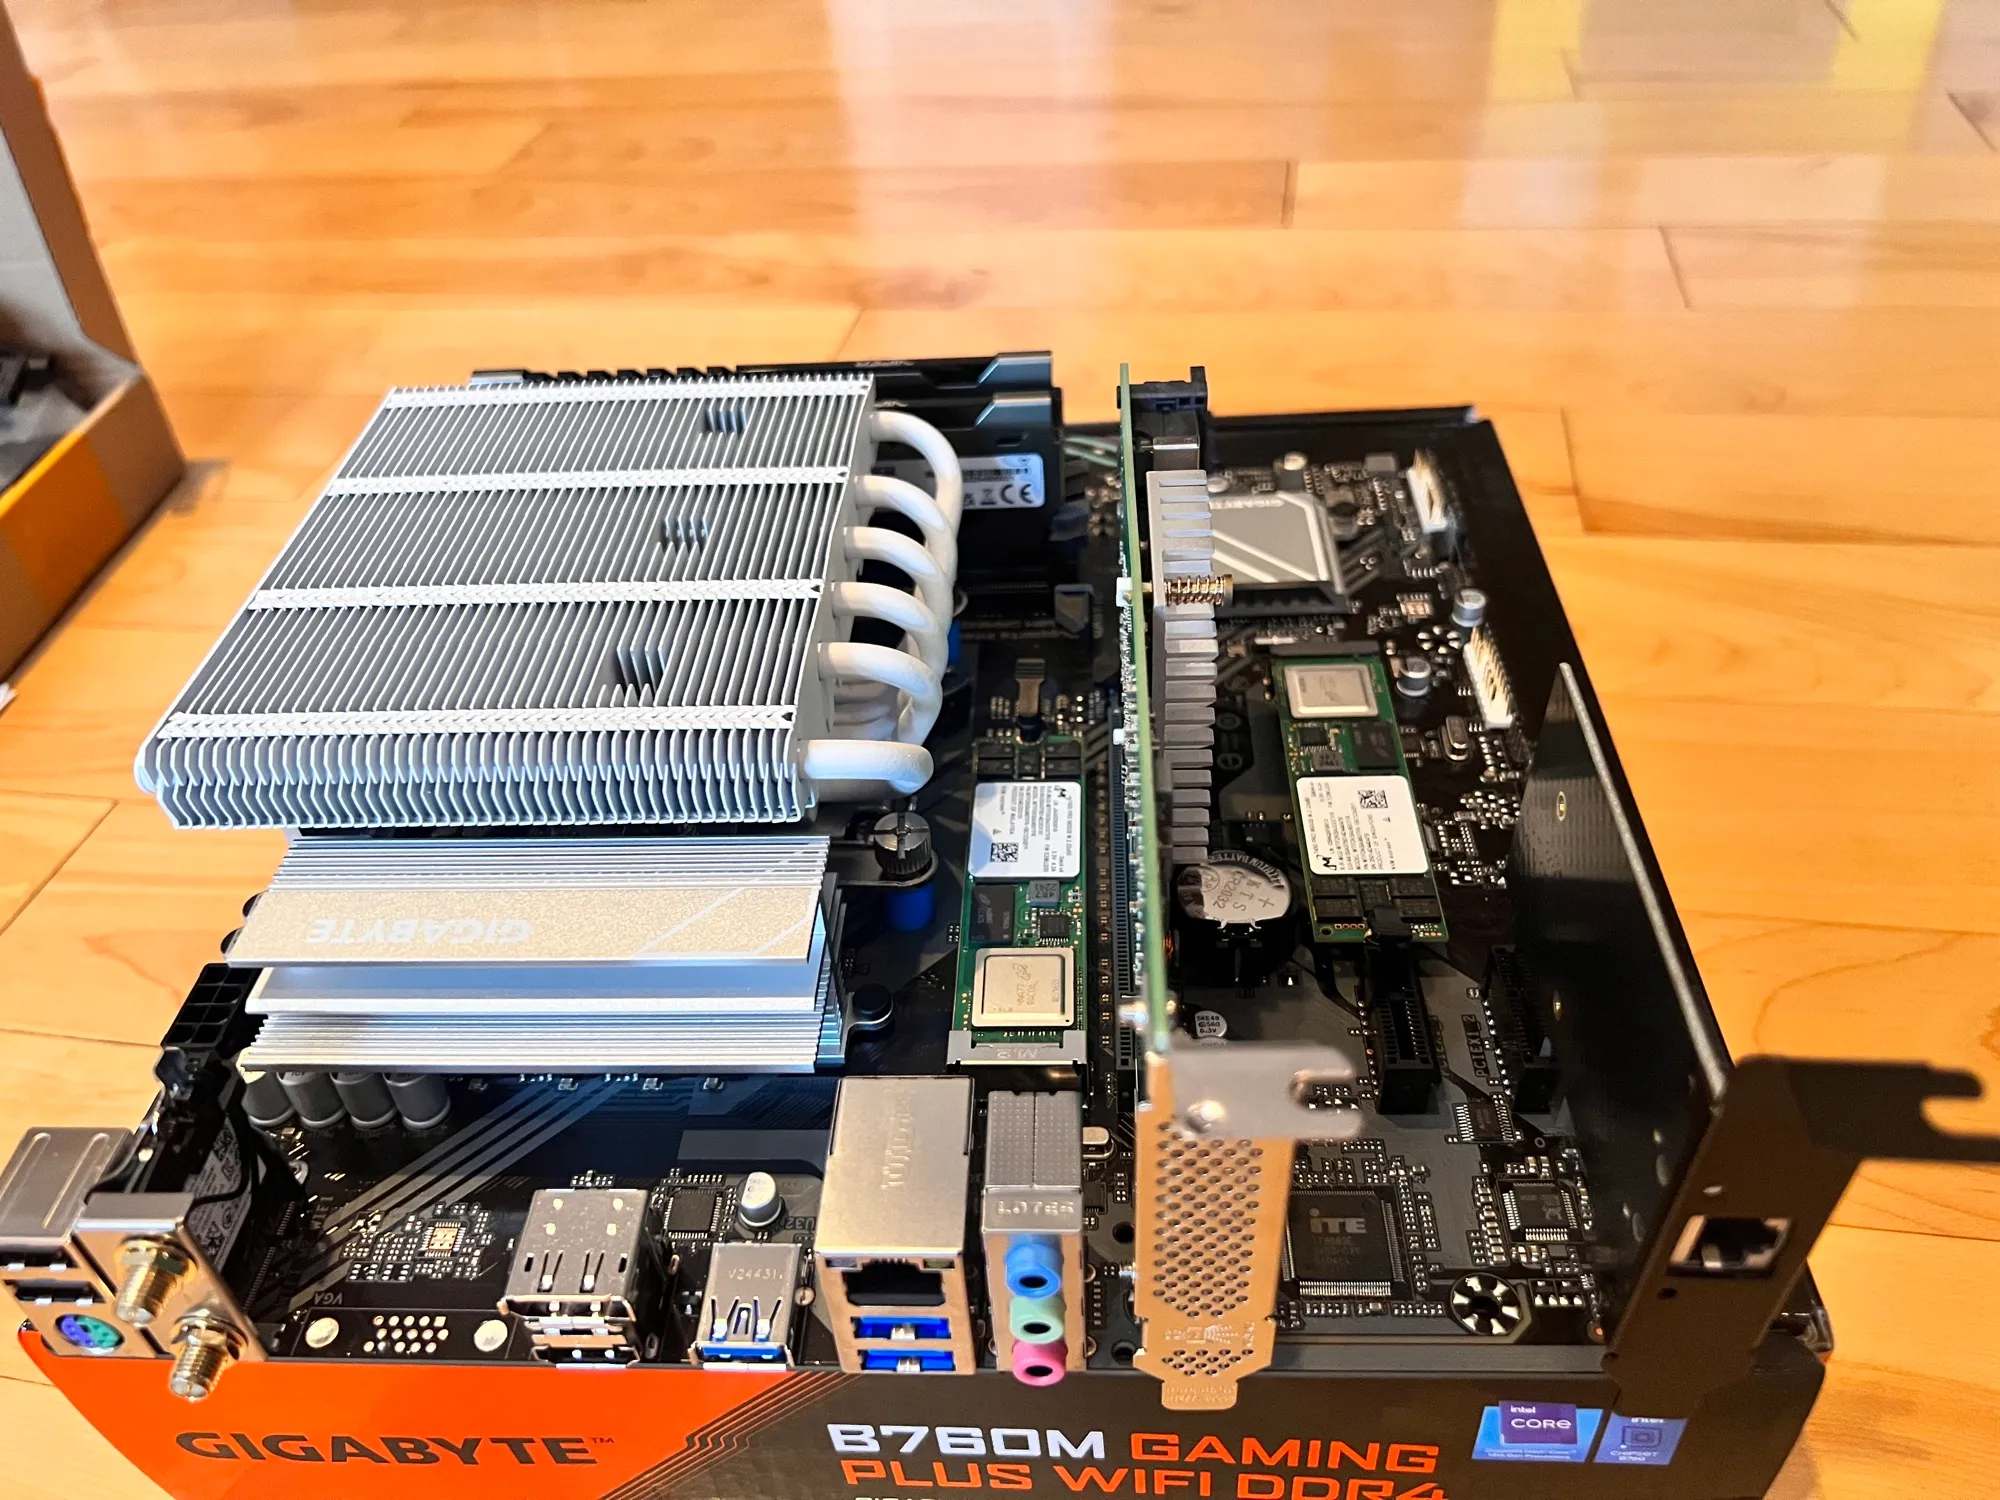
Assembling the homelab box
Part choices for a quiet Proxmox VE 9 server, from a walnut-front NAS case to data-center NVMe, with build photos and the first boot
Overview
This is the hardware half of the homelab story. The software side, the design decisions and the running services, live in A single-box homelab on Proxmox VE 9; this post is the box itself: what I bought, how it went together, and what the first boot looked like.
The build came together in spring 2025, and every choice on the list answered to the same constraint: the box lives in the house, under the stairs, a few steps from the living room. That rules out a rack, which is a machine room with fans and a noise floor, and it rules out a NAS appliance, which caps the whole story at whatever its firmware allows. A desktop-class build was the shape that survived: quiet enough to forget, every part replaceable from any computer shop, and nothing in it that only exists to look like a server.
The box at a high level
Hardware-wise, the requirement was one quiet desktop-class machine that carries the whole household, and every part choice follows from it. Concretely: a micro-ATX build running Proxmox VE 9 with one unprivileged LXC container per service plus a couple of VMs. The i5-13400’s UHD 730 is the workhorse; Jellyfin transcodes and camera streams go through /dev/dri passthrough, so there is no discrete GPU anywhere adding heat or noise. 64 GB of DDR4 keeps the VMs comfortable, with 24 GB of it assigned to the OPNsense edge VM alone. Storage is two tiers: a mirrored pair of 960 GB NVMe drives as the ZFS rpool, carrying the OS and every guest root disk, and one 14 TB HDD as the utank pool for the bulk, media, photos, backups, the data worth keeping. Two NICs split the network roles: the Intel I226-V card bridges to the LAN at 2.5 GbE, the onboard Realtek faces the WAN at 1 GbE, and keeping the roles on separate physical ports is what keeps the firewall bridge simple.
The parts list below is the concrete version of that summary.
The parts
The final parts list, matching what the design-notes post runs on today:
| Part | Choice |
|---|---|
| Case | Jonsbo N4, white, walnut front |
| PSU | Corsair SF750, SFX, 750 W, 80+ Platinum |
| Board | Gigabyte B760M Gaming Plus WiFi (DDR4) |
| CPU | Intel i5-13400, 10 cores / 16 threads |
| Cooler | Thermalright white twin-tower, two 120 mm fans |
| RAM | 64 GB DDR4-2667, Patriot Viper 2 x 32 GB |
| Boot / VM disk | 2 x 960 GB Micron 7450 PRO M.2 (ZFS mirror) |
| Bulk disk | 14 TB Seagate Exos 2X14 (ZFS, single disk) |
| HBA | Fujitsu 9300-8i, LSI SAS3008, IT mode |
| NICs | Intel I226-V 2.5 GbE PCIe card (LAN), onboard Realtek RTL8111 1 GbE (WAN) |
| iGPU | Intel UHD Graphics 730 (built into the 13400) |
Why each part
- Case: Jonsbo N4 ↗. A NAS chassis that does not look like a server: walnut front panel, steel body, six 3.5-inch hot-swap bays plus two 2.5-inch mounts, micro-ATX, SFX power supply. The hot-swap bays are the part I would not give back now: a drive change is opening the front and swinging a tray, not a bench session with a screwdriver.
- PSU: Corsair SF750. Overkill for this box, deliberately so. A 750 W Platinum SFX unit in a build that will never ask for half of it, sized so every future drive and every power spike lands well inside what it can give. Fully modular turns out to matter more in a small case than the wattage does: only the cables the build actually uses ever enter it.
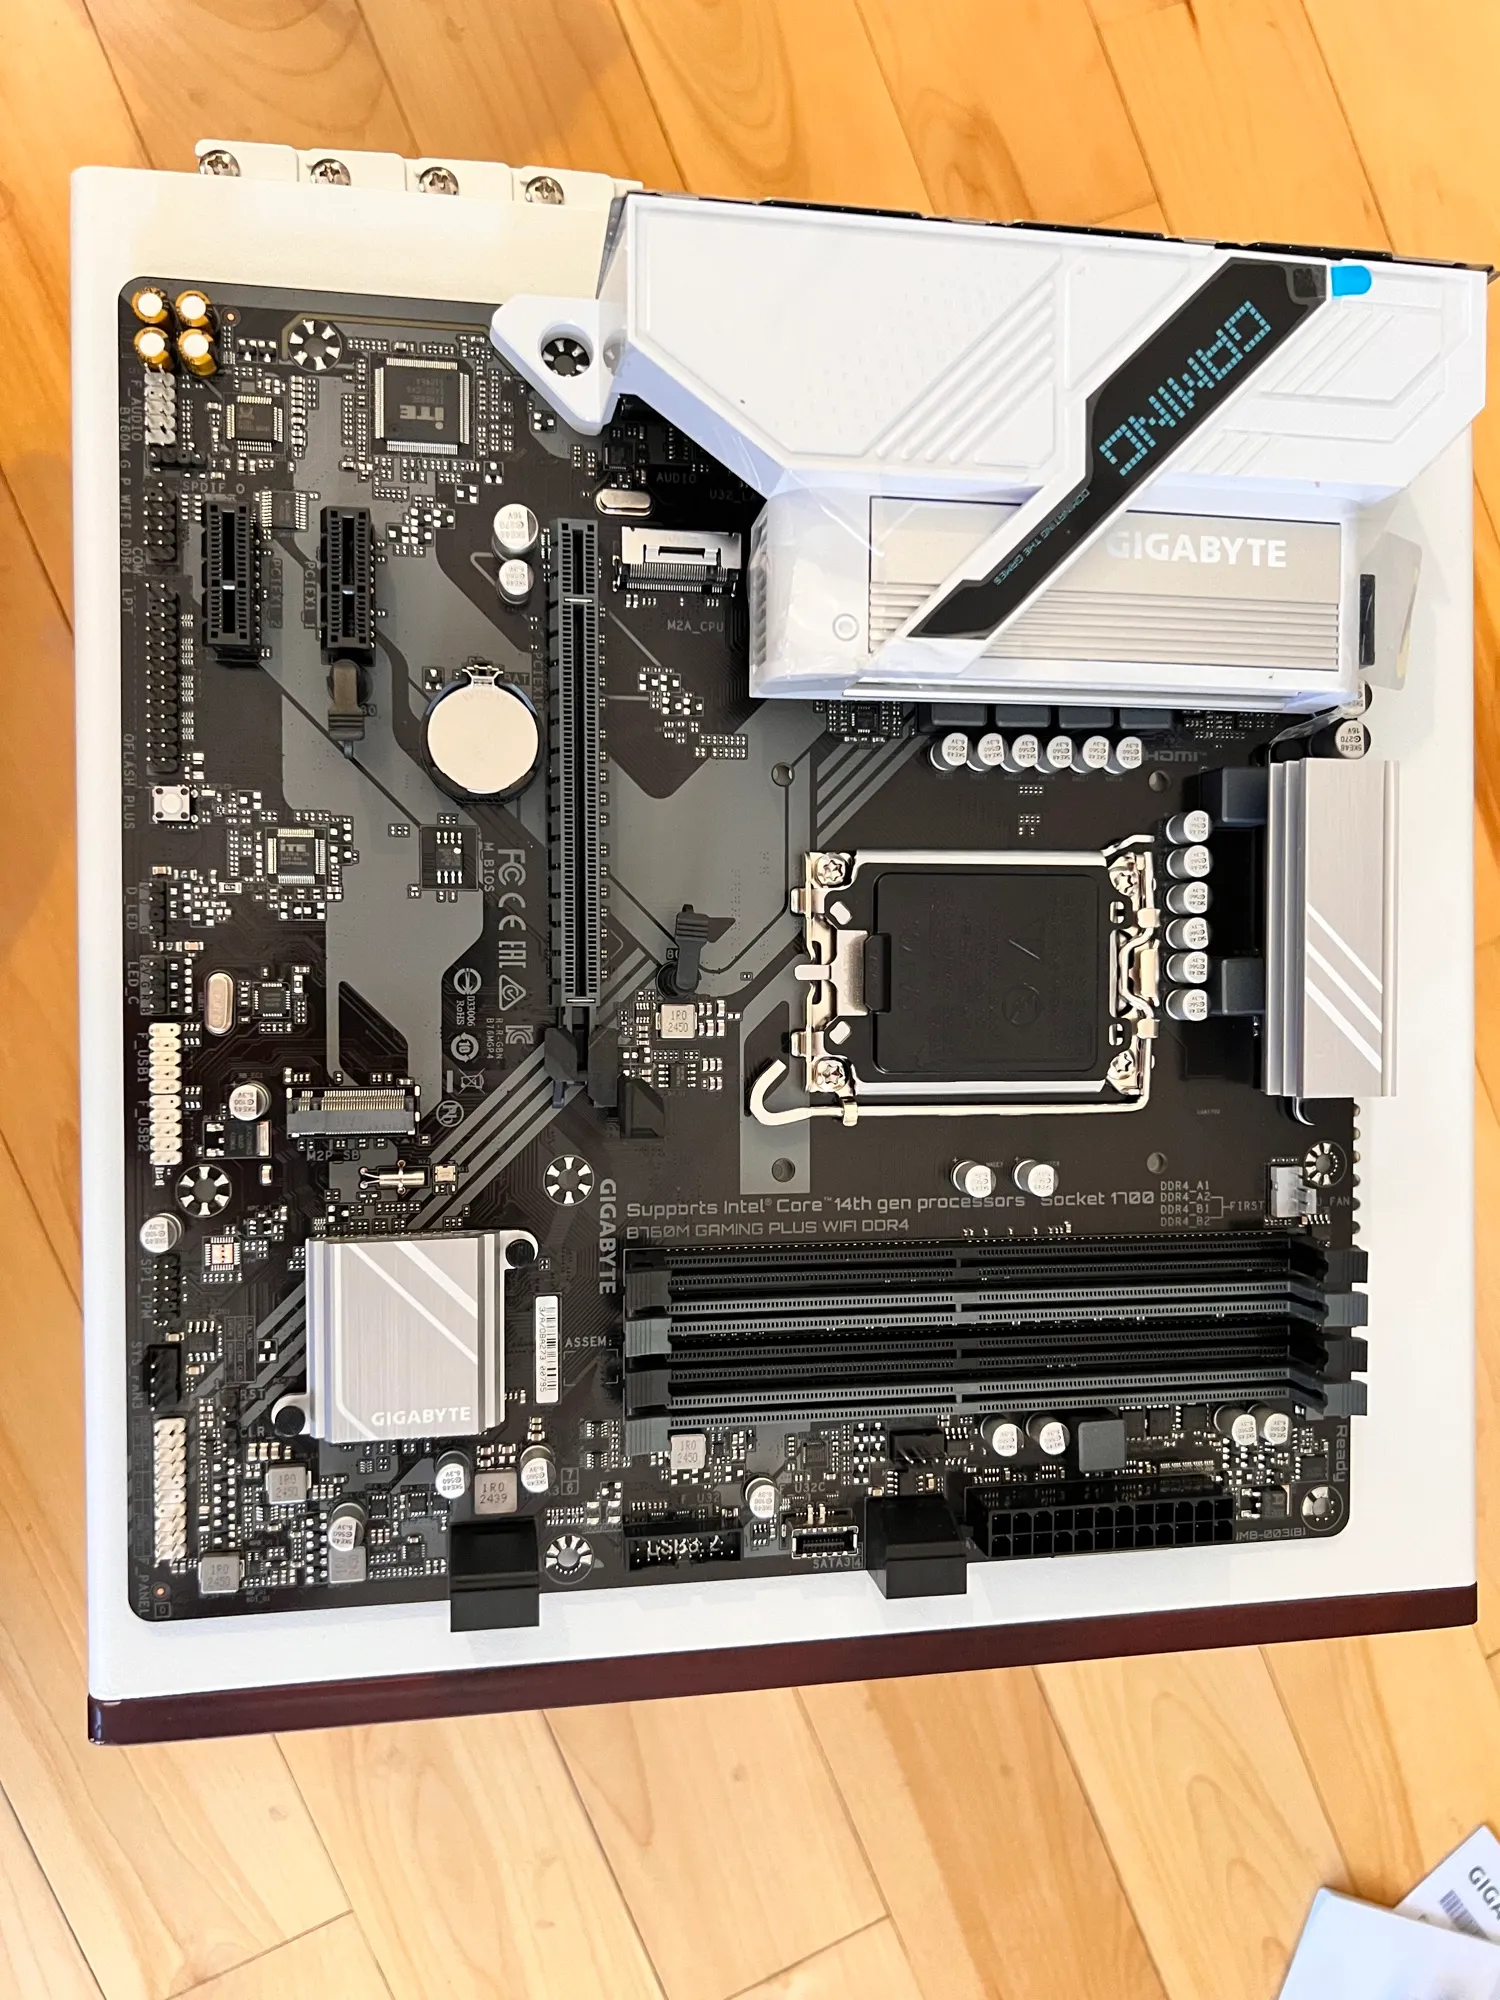
- Board: Gigabyte B760M Gaming Plus WiFi (DDR4). The DDR4 variant, picked at a time when a 2 x 32 GB DDR4 kit cost a fraction of the DDR5 equivalent and 64 GB was exactly where this build needed to land. Four DIMM slots (two still free), one PCIe 4.0 x16, two x1 slots, two M.2 connectors, which is the expansion this build needs and not much more.
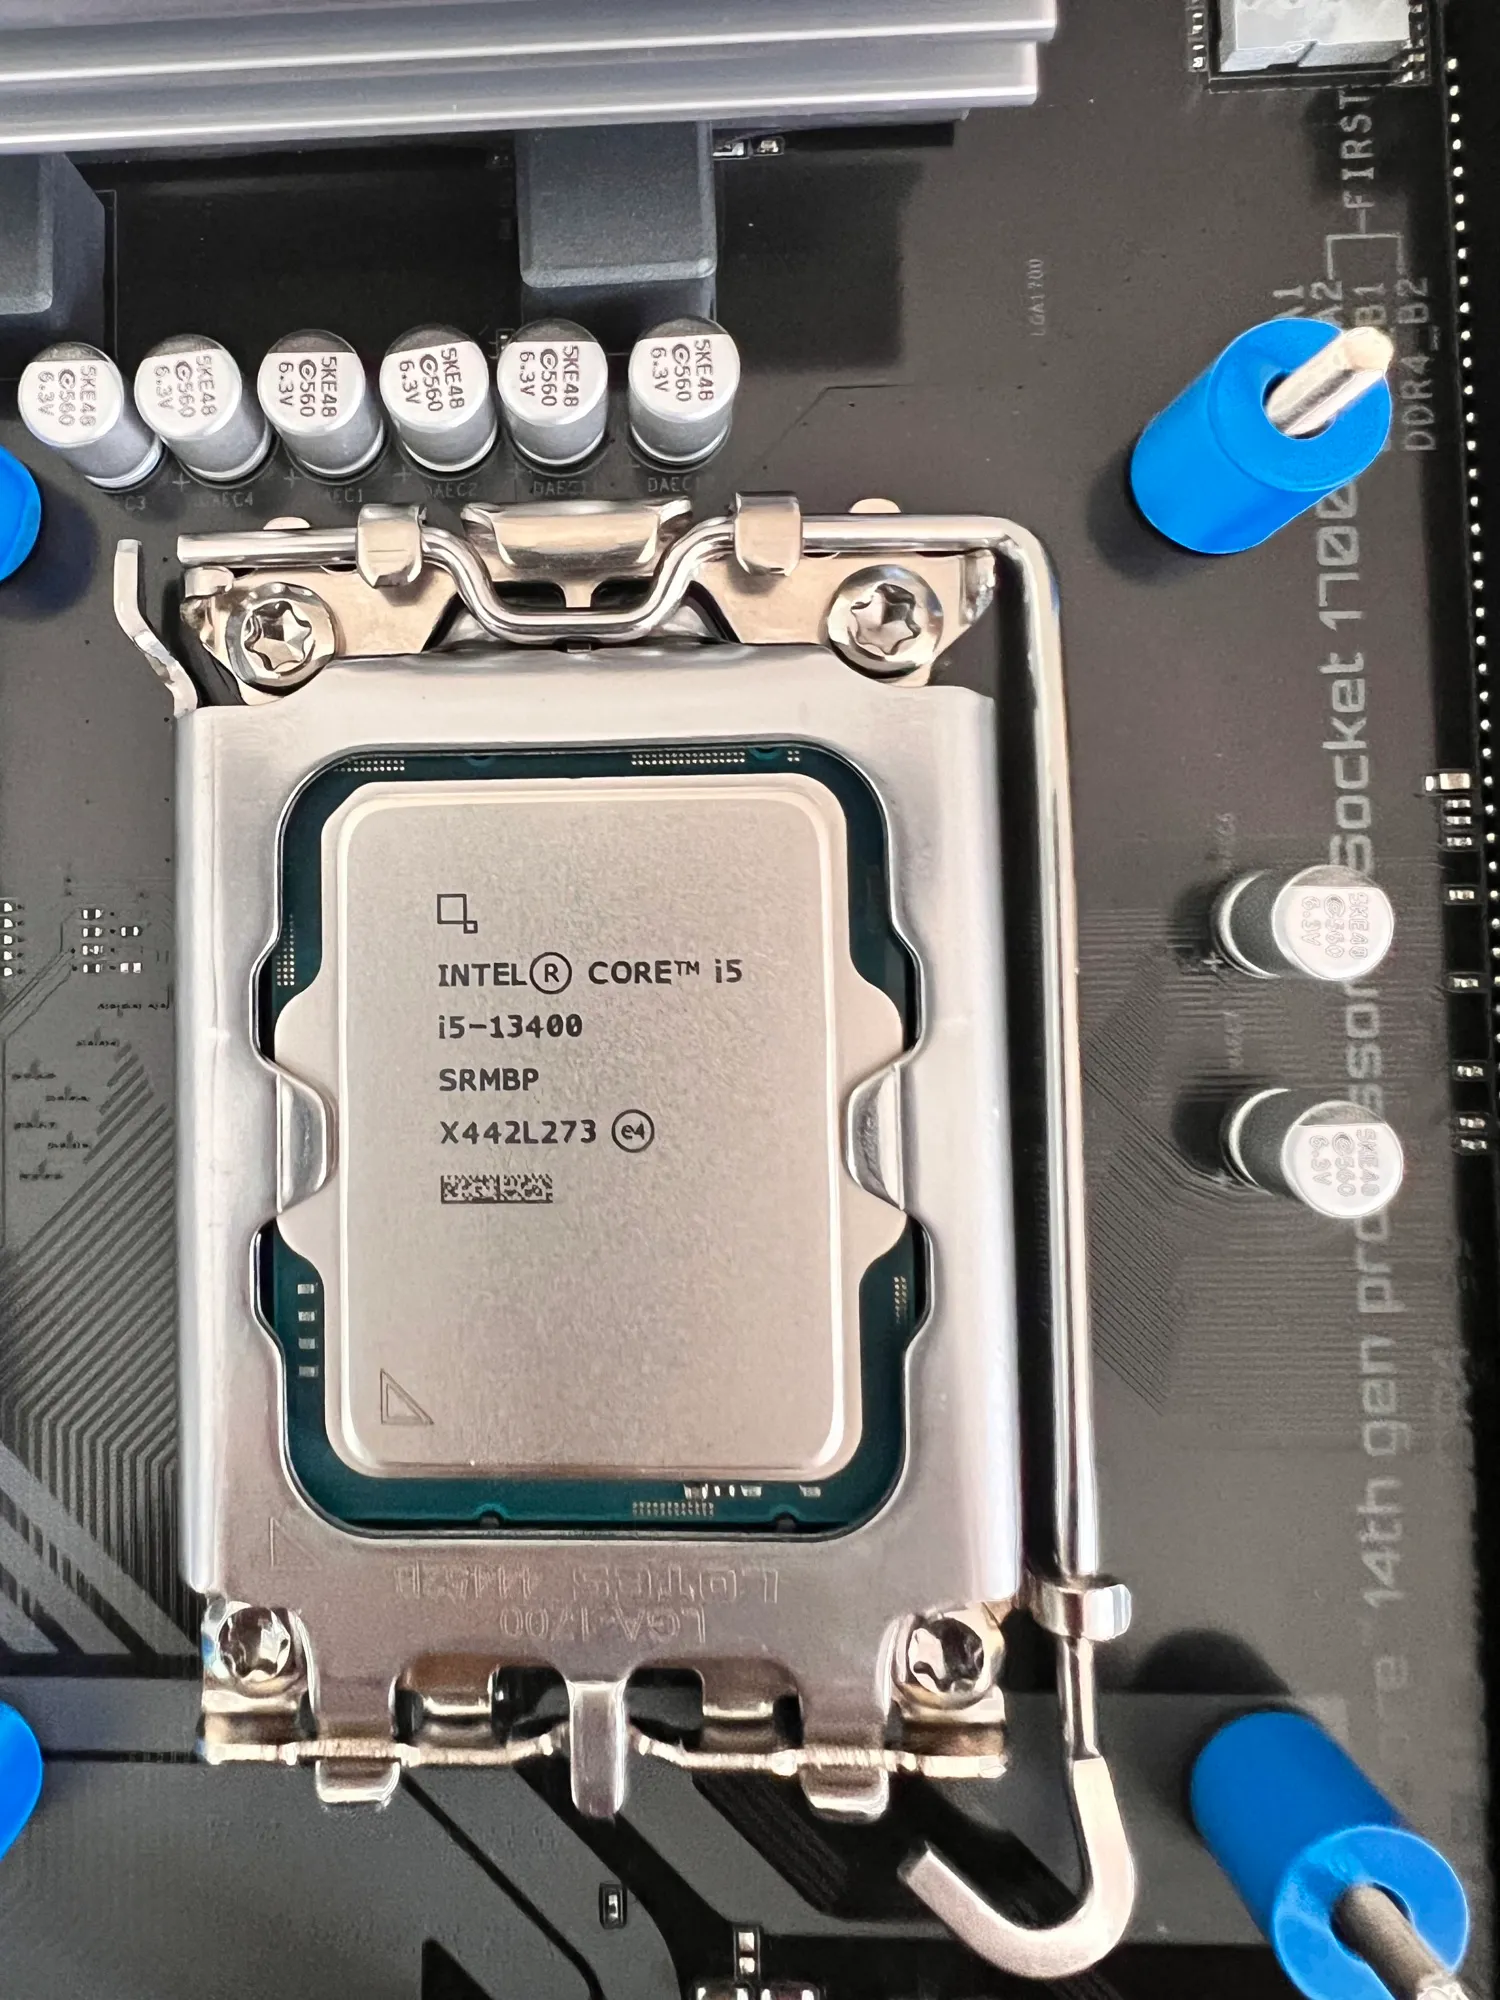
- CPU: i5-13400. Six P-cores, four E-cores, sixteen threads, and a 65 W base envelope that only stretches to 148 W when something heavy shows up. I picked it for the performance-per-watt curve: it spends most of its life far below its boost number and still runs every service container and transcode the household throws at it. The UHD 730 on the package is not an afterthought either; it is the transcode engine the whole media stack leans on.
- Cooler: Thermalright white twin-tower. Six heat pipes, one 120 mm fan per tower, chosen because a 65 W-class CPU needs silence more than it needs exotic cooling. White because the case is white.
- RAM: Patriot Viper, 2 x 32 GB DDR4-2667. Two sticks for the two channels, two slots left open for a future bump. Nothing this box does has ever been memory-speed-bound; capacity was the thing worth buying.
- Boot/VM disk: 2 x 960 GB Micron 7450 PRO ↗ M.2. Data-center NVMe: PCIe 4.0 x4 and, the part that actually sold me, power-loss protection. On ZFS, sync writes are the whole contract, and a boot pool full of guest disks is the last place I want drives that guess about flushing. M.2 2280 means both drives sit on the board with zero cables.
- Bulk disk: 14 TB Seagate Exos 2X14. Shucked from a Seagate Expansion Desktop external, and the shuck turned out better than the price suggested: the drive inside is a MACH.2 dual-actuator Exos. What was inside, how the shuck went, and what MACH.2 even means get their own post: Shucking the Seagate Expansion Desktop 14TB.
- HBA: Fujitsu 9300-8i. An OEM LSI SAS3008 card: PCIe 3.0 x8, eight internal 12 Gb/s ports over two SFF-8643 connectors, running IT-mode firmware so ZFS talks to the drives directly with no RAID layer in between. The N4’s backplane hangs off it, and the card is sized for capacities several times what the box holds today.
- NICs: Intel I226-V card plus onboard Realtek. The I226-V takes the LAN bridge at 2.5 GbE; Intel NICs behave predictably under Linux bridges, which is most of what I ask of them. The onboard Realtek runs the WAN leg, where the ISP gives 1 GbE anyway. Two physical ports, two roles, no VLAN gymnastics on the edge.
Assembly
The board got fully populated on its own box first, then the whole assembly dropped into the case in one piece. Working on a bench instead of inside a chassis is the difference between a build afternoon and a build week.
CPU
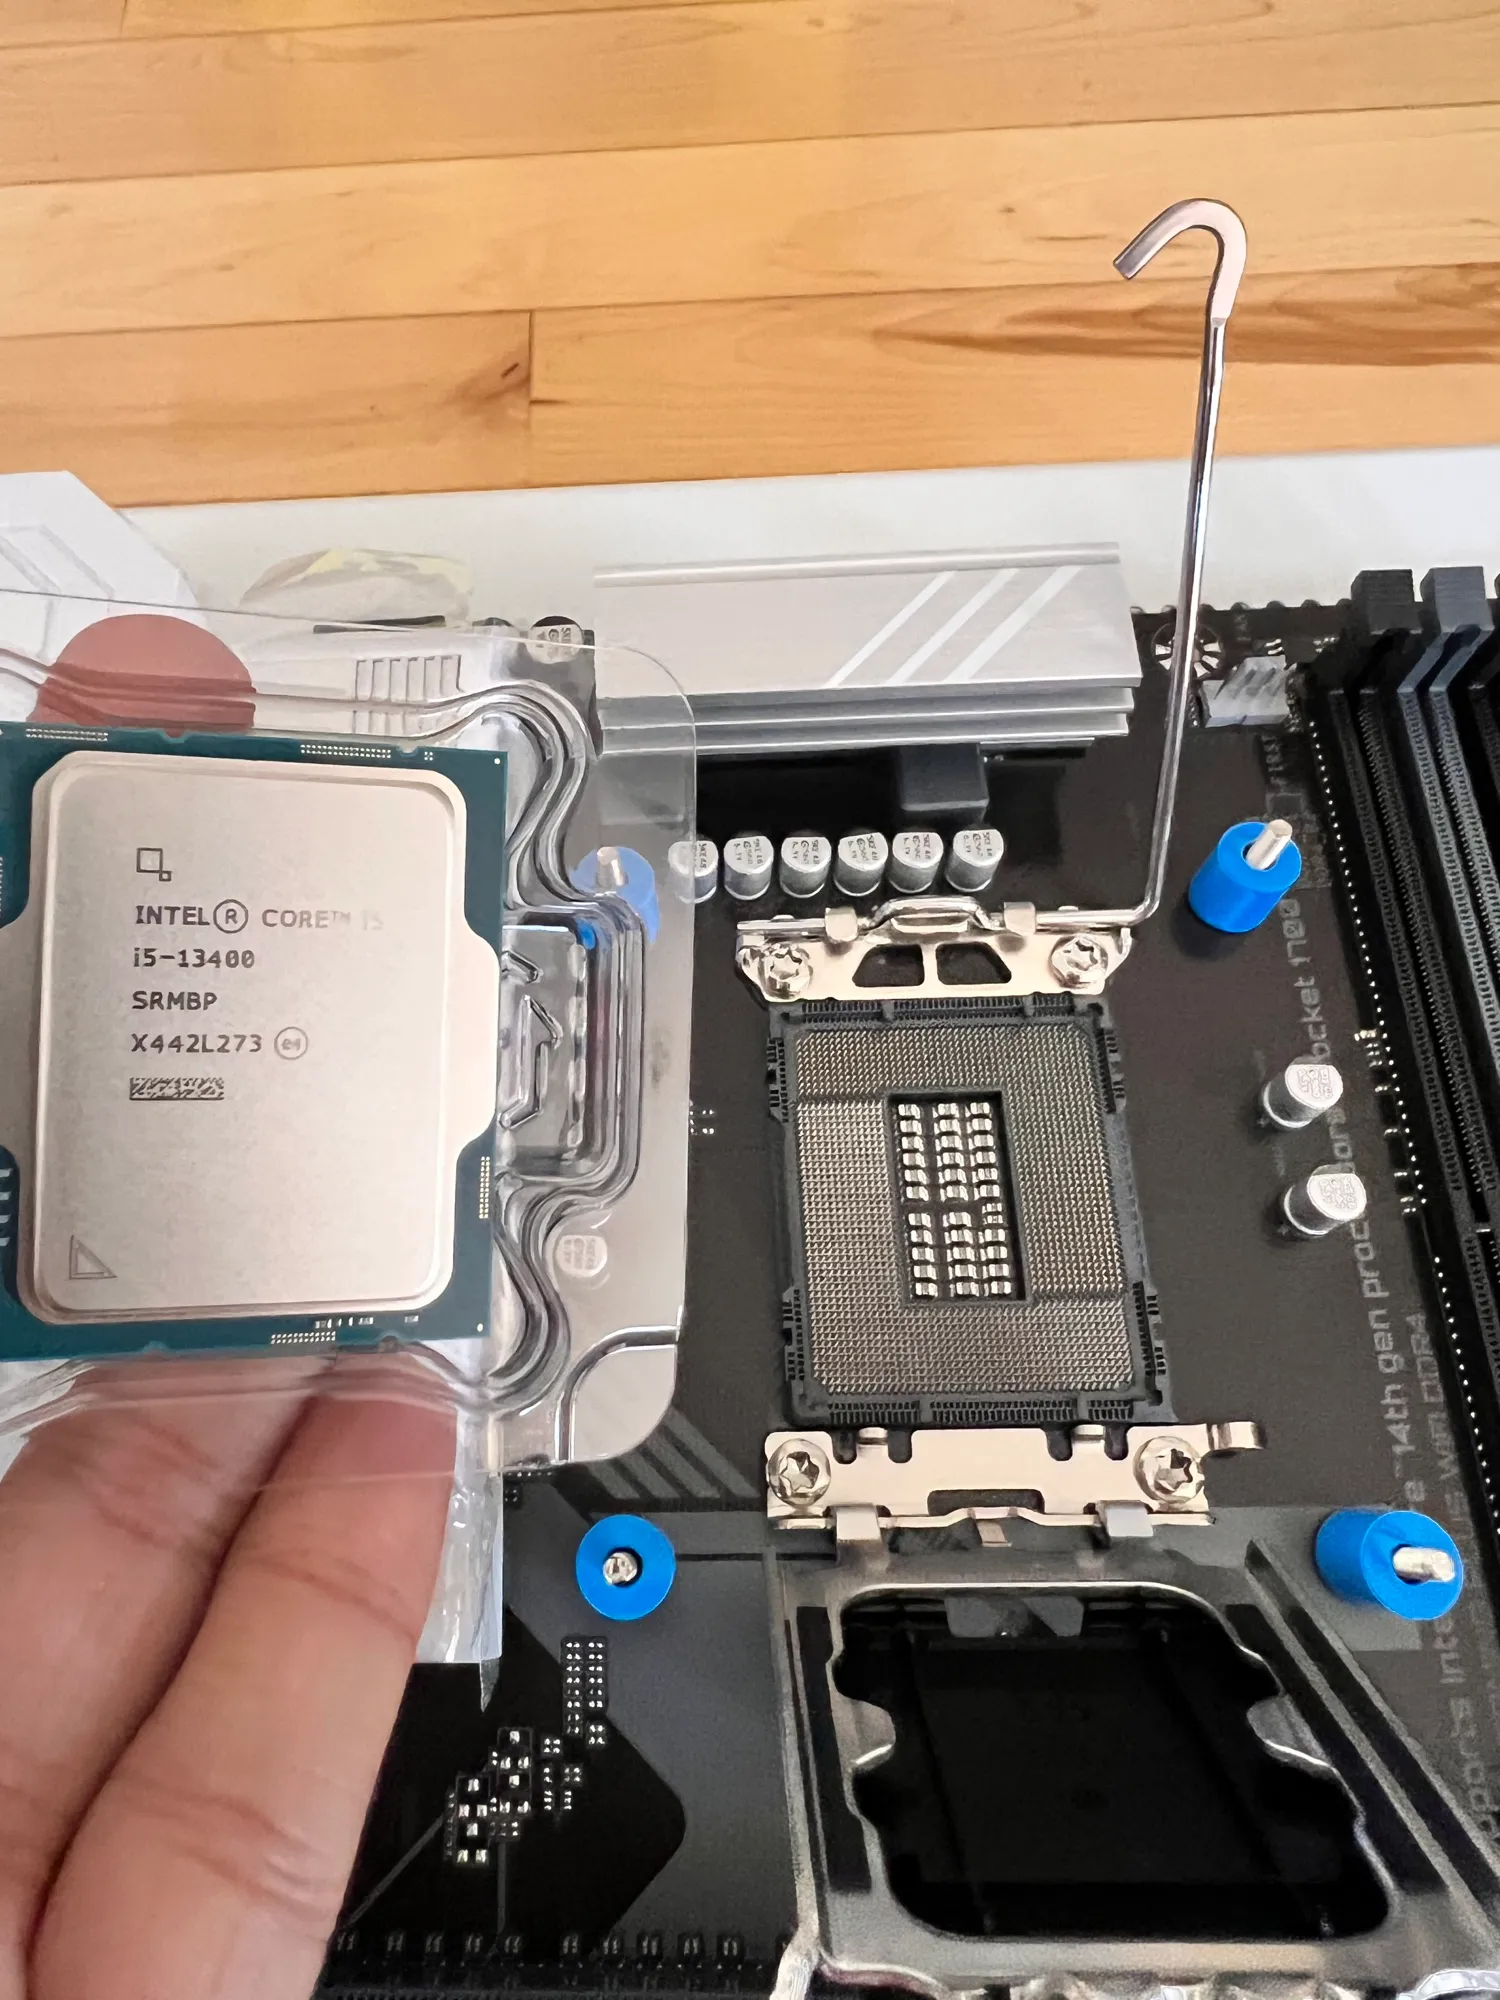
The socket does all the work: match the triangle on the package to the corner of the socket, rest the chip flat, close the retention bracket, drop the lever. No force anywhere. If it needs force, something is misaligned.
RAM
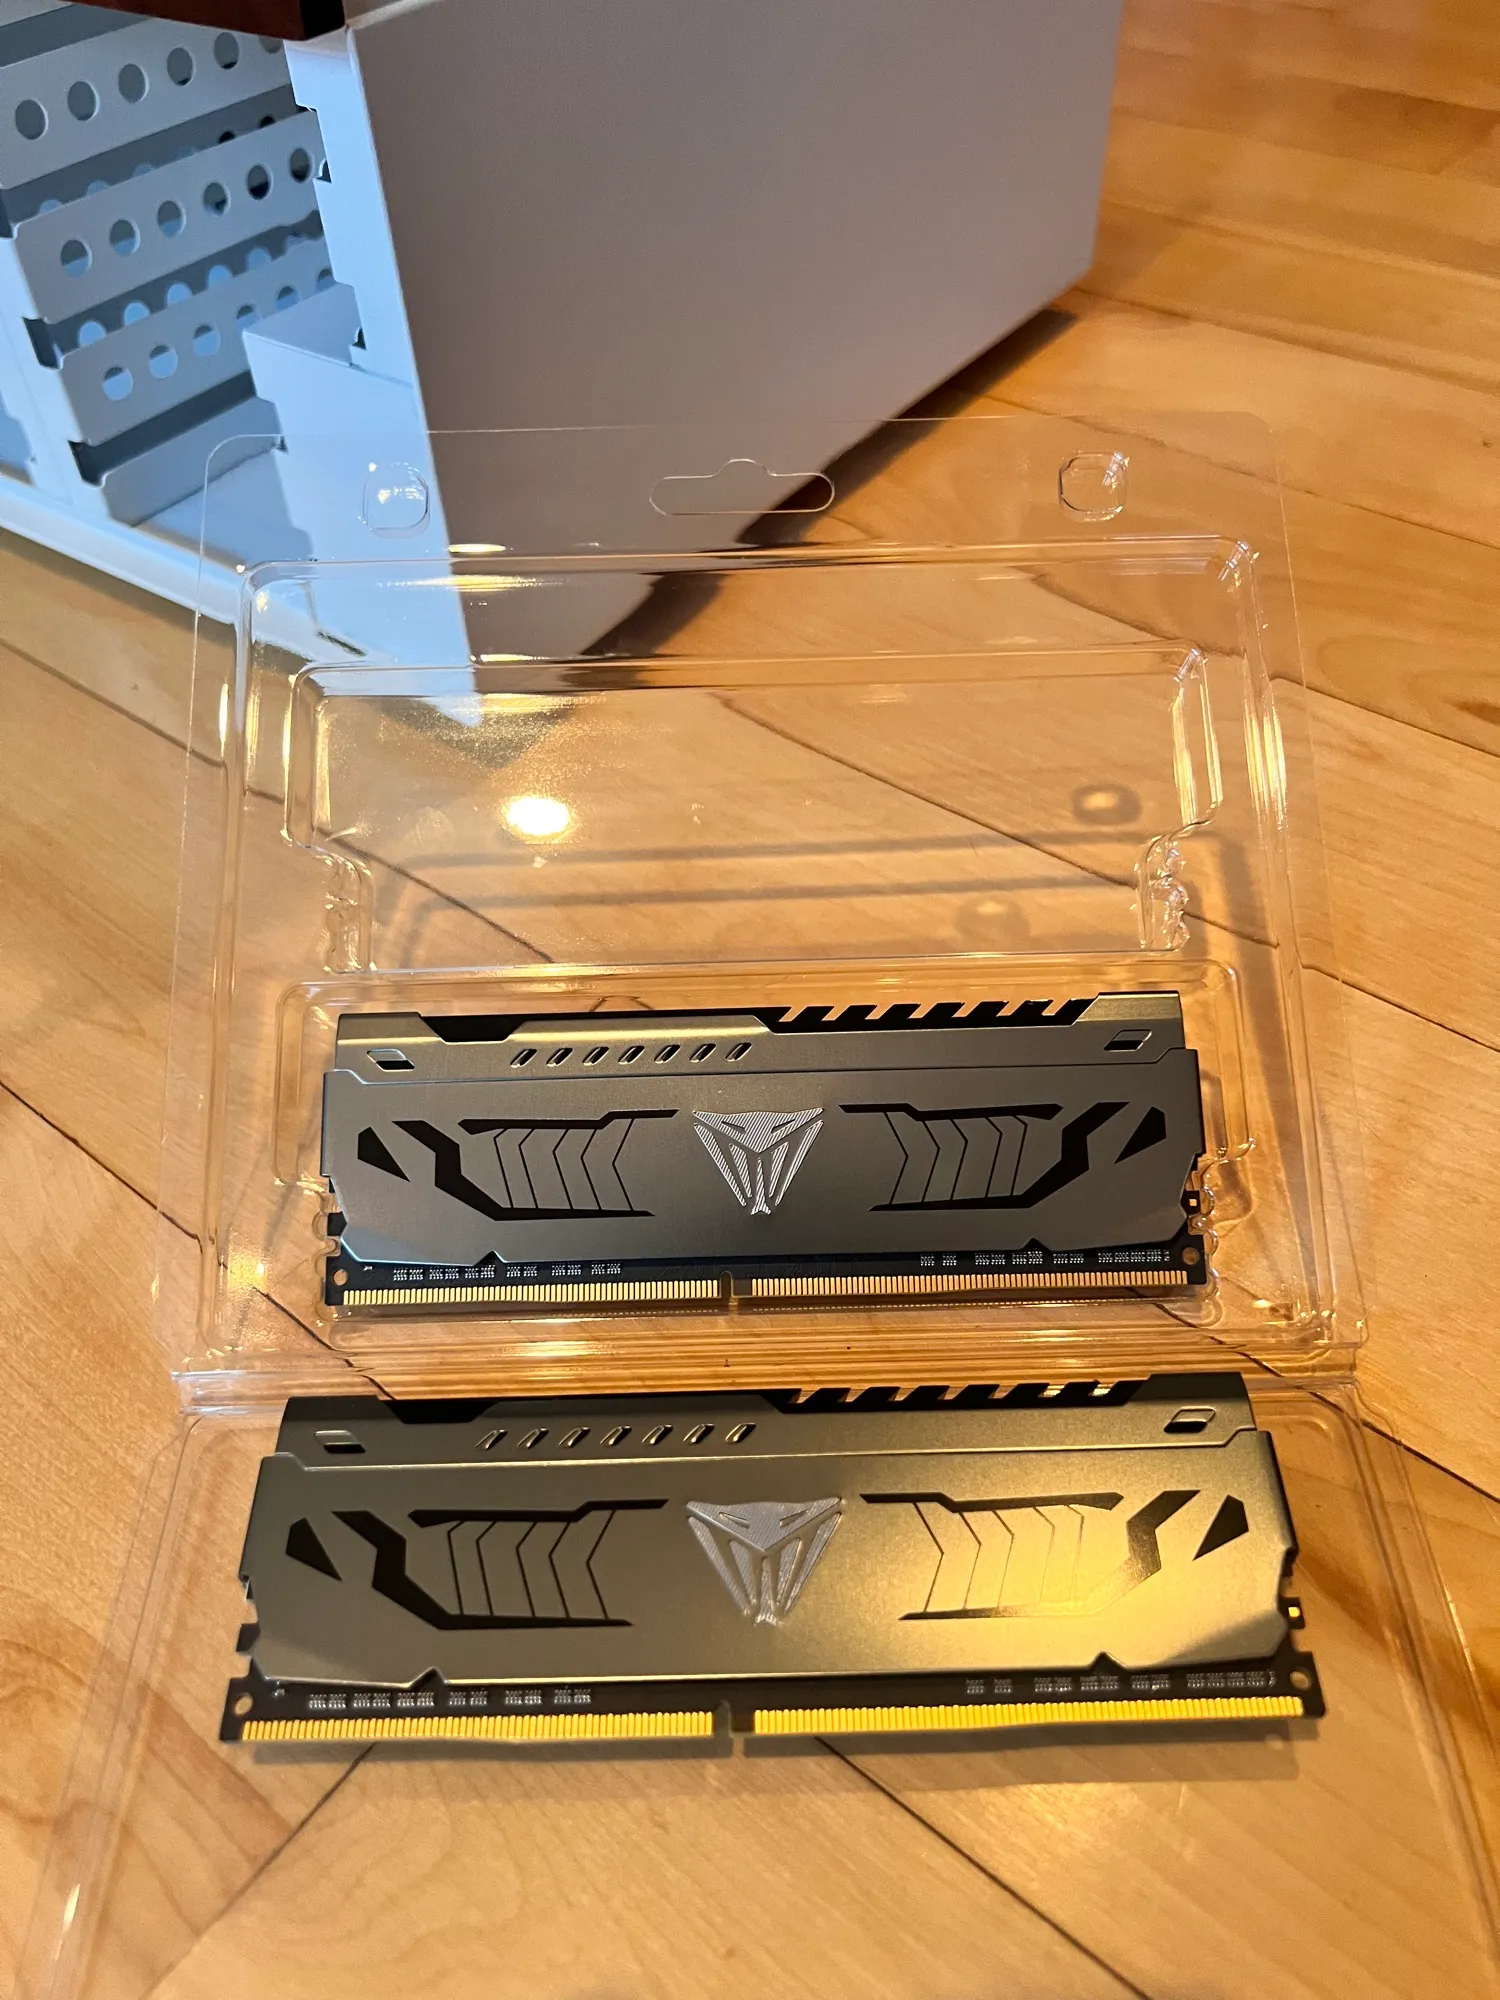
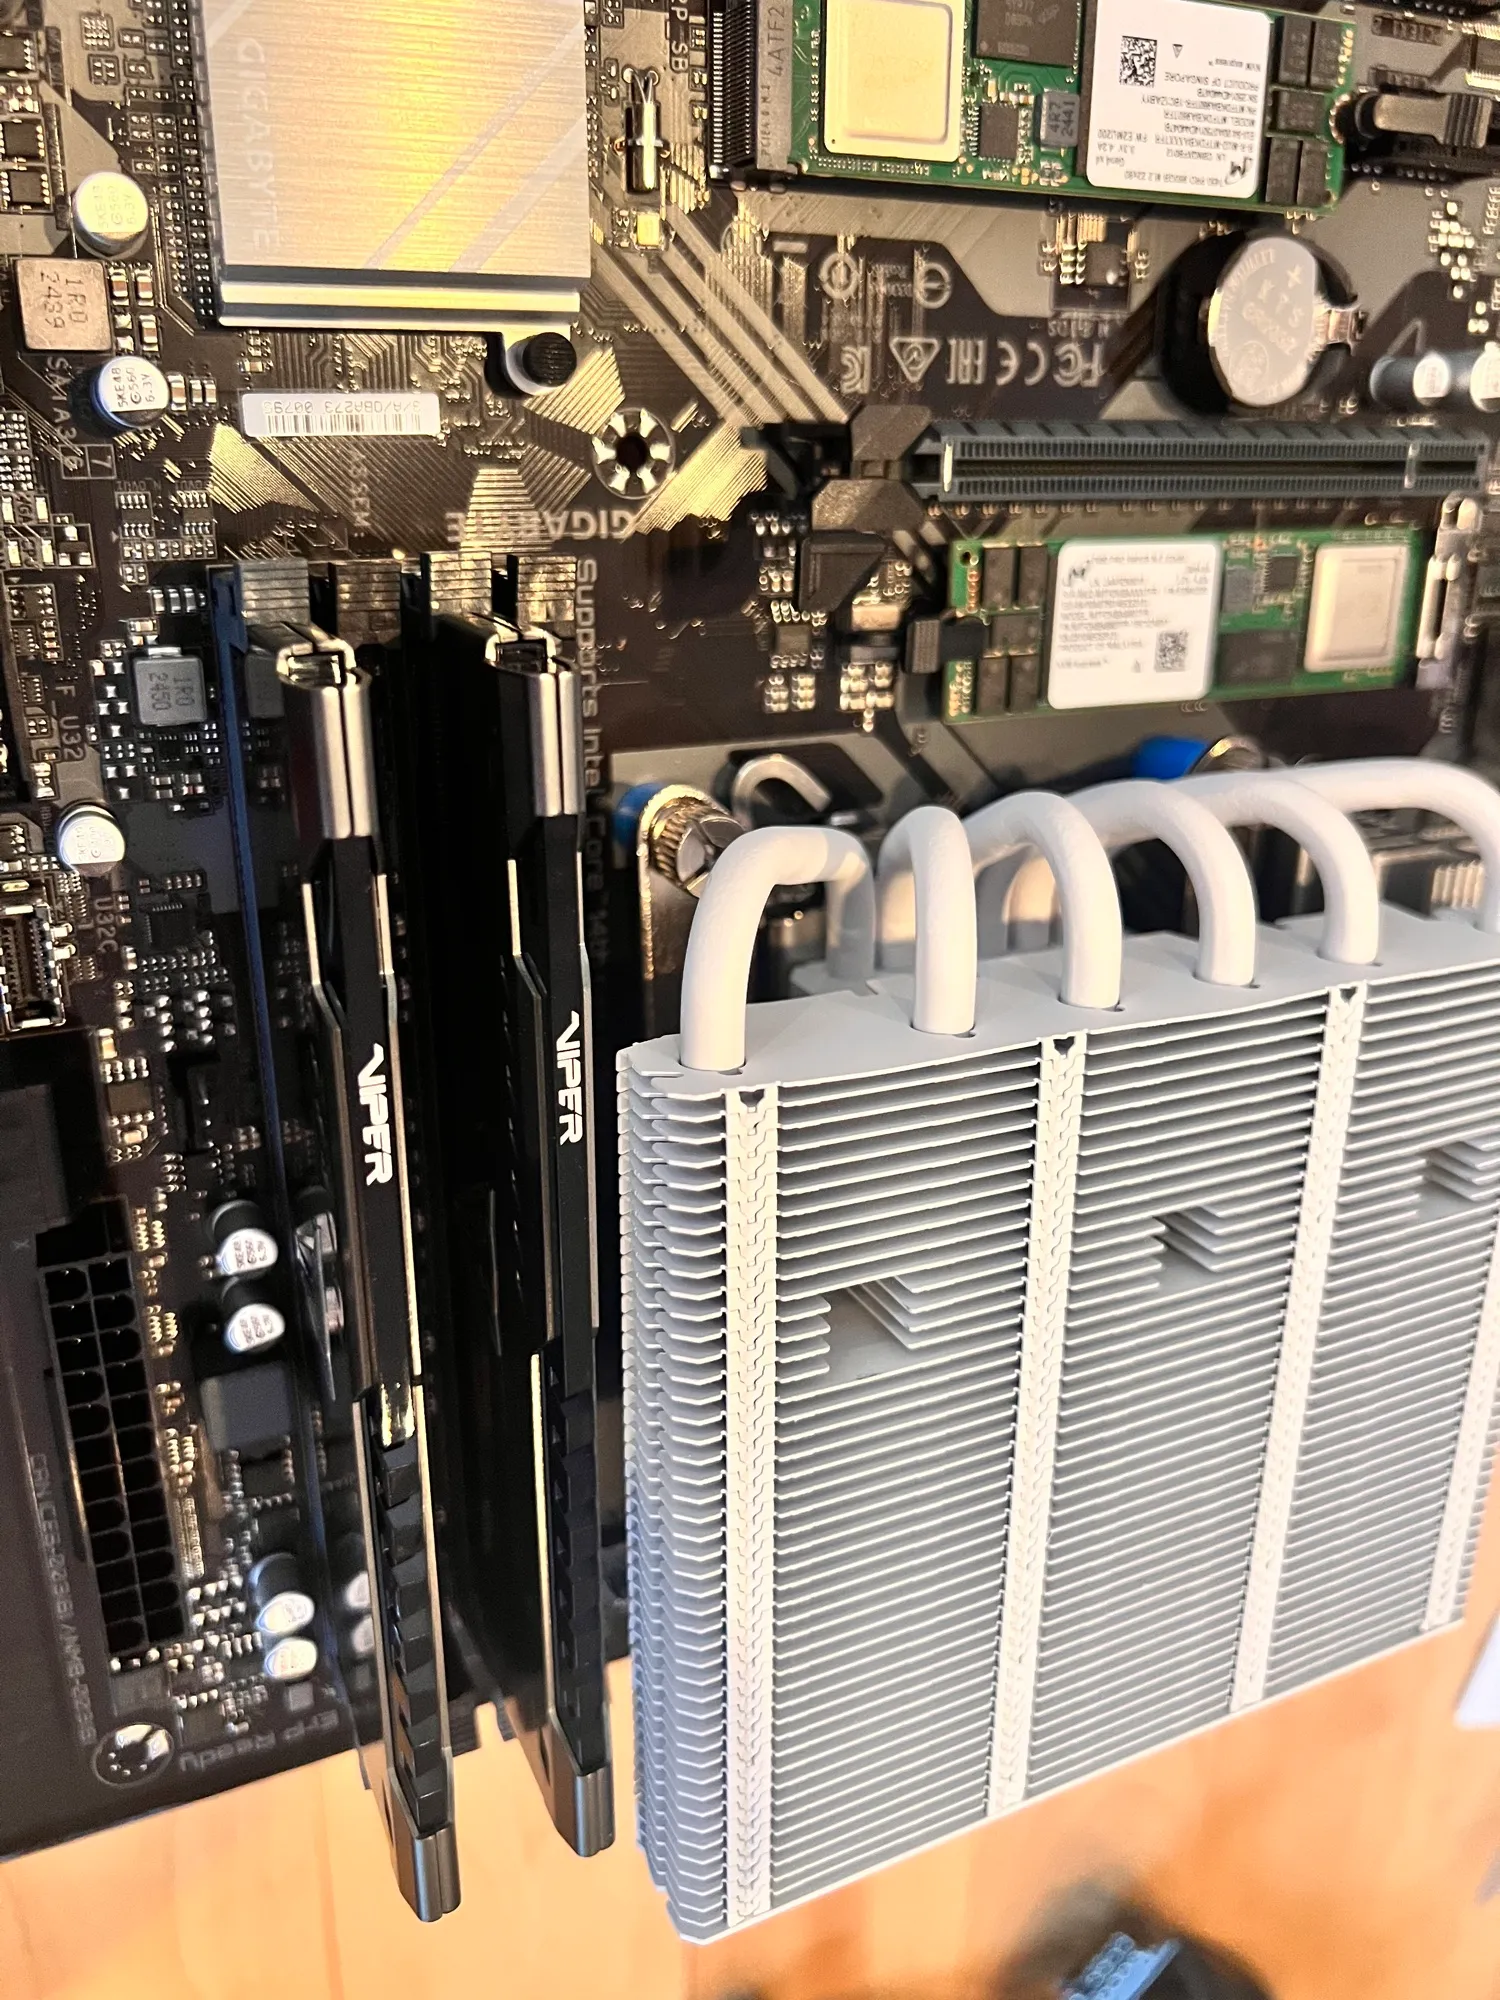
Two 32 GB sticks, paired slots per the board manual, latches closing on both ends with a click that leaves no doubt. That click is the most satisfying part of any build.
Cooler
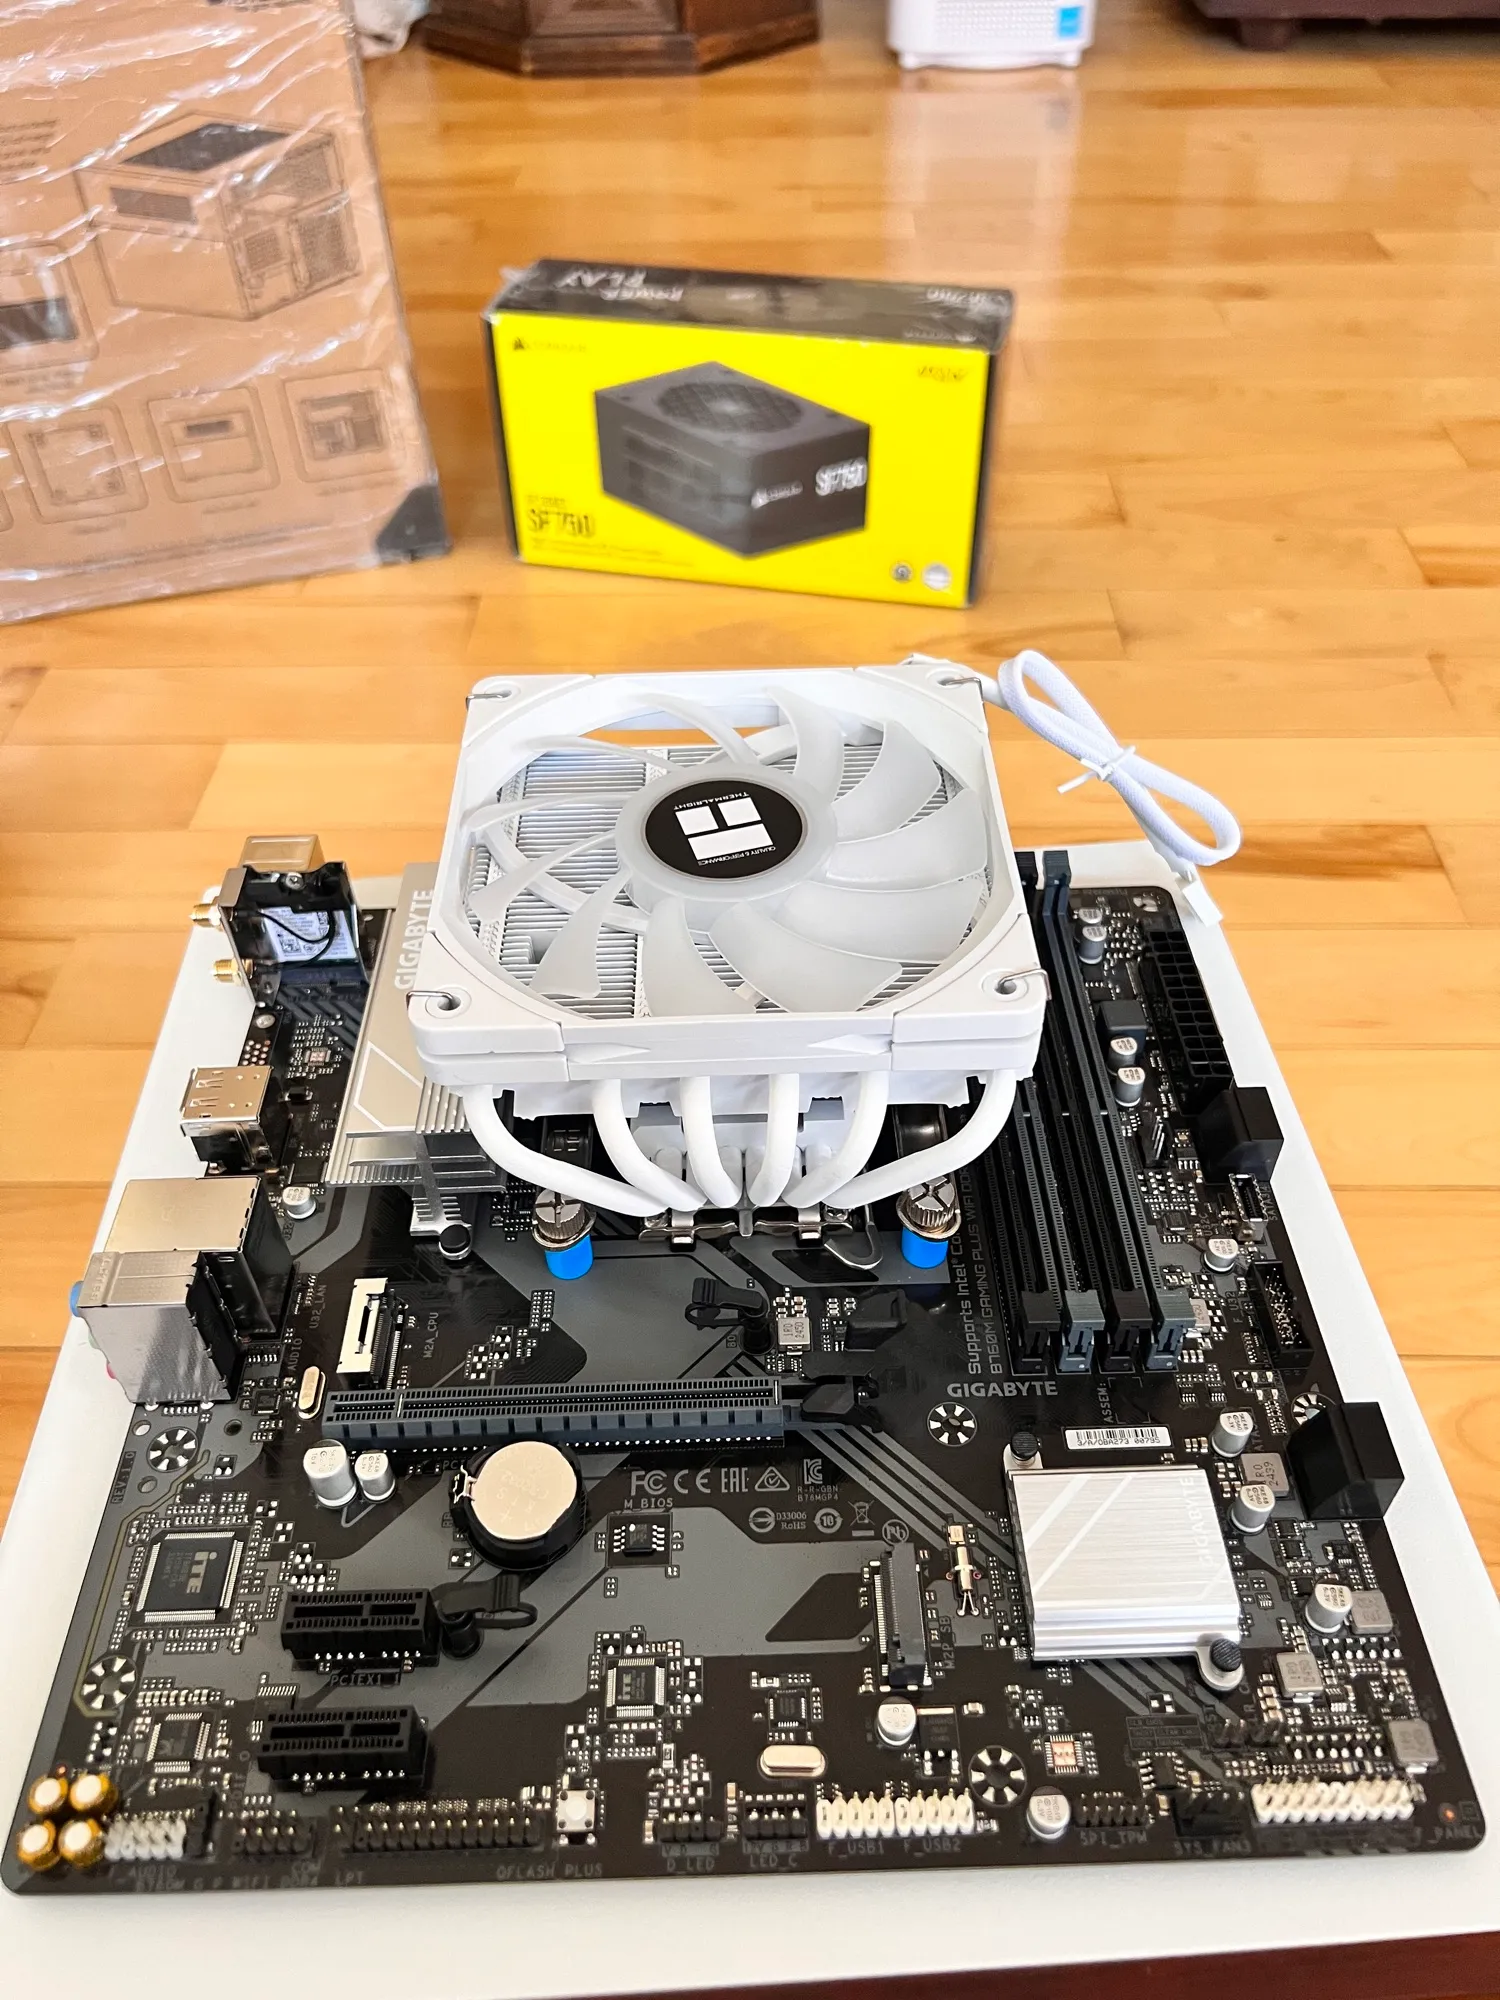
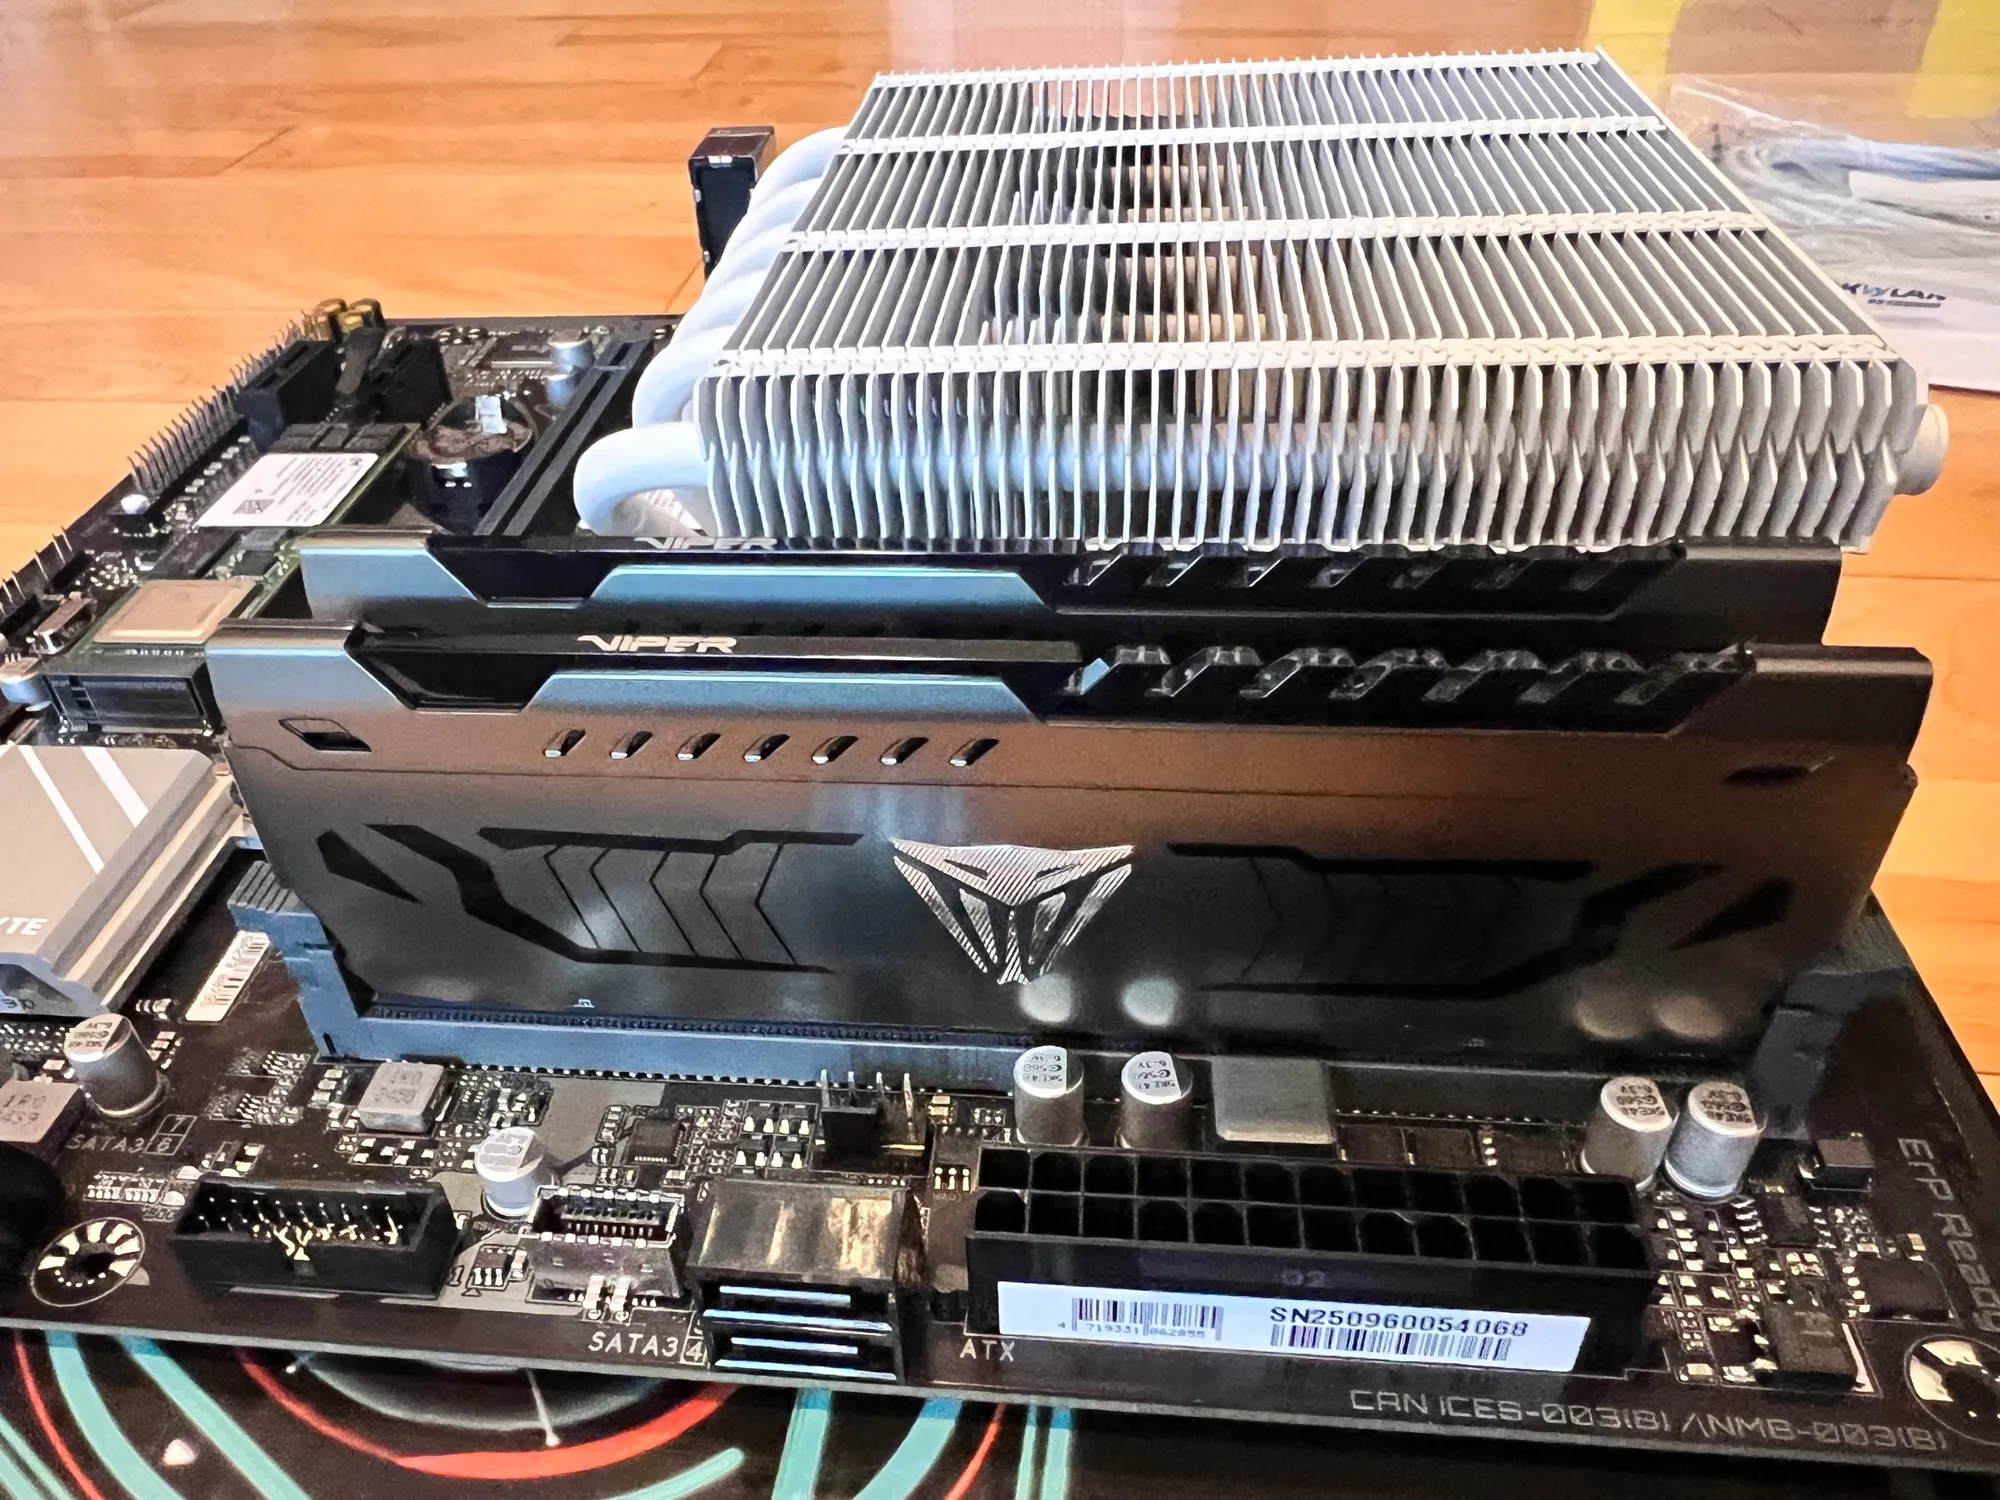
A white Thermalright twin-tower, six heat pipes, one 120 mm fan per tower. Order matters here: RAM goes in before the cooler, because the front tower overhangs the outermost DIMM slot:
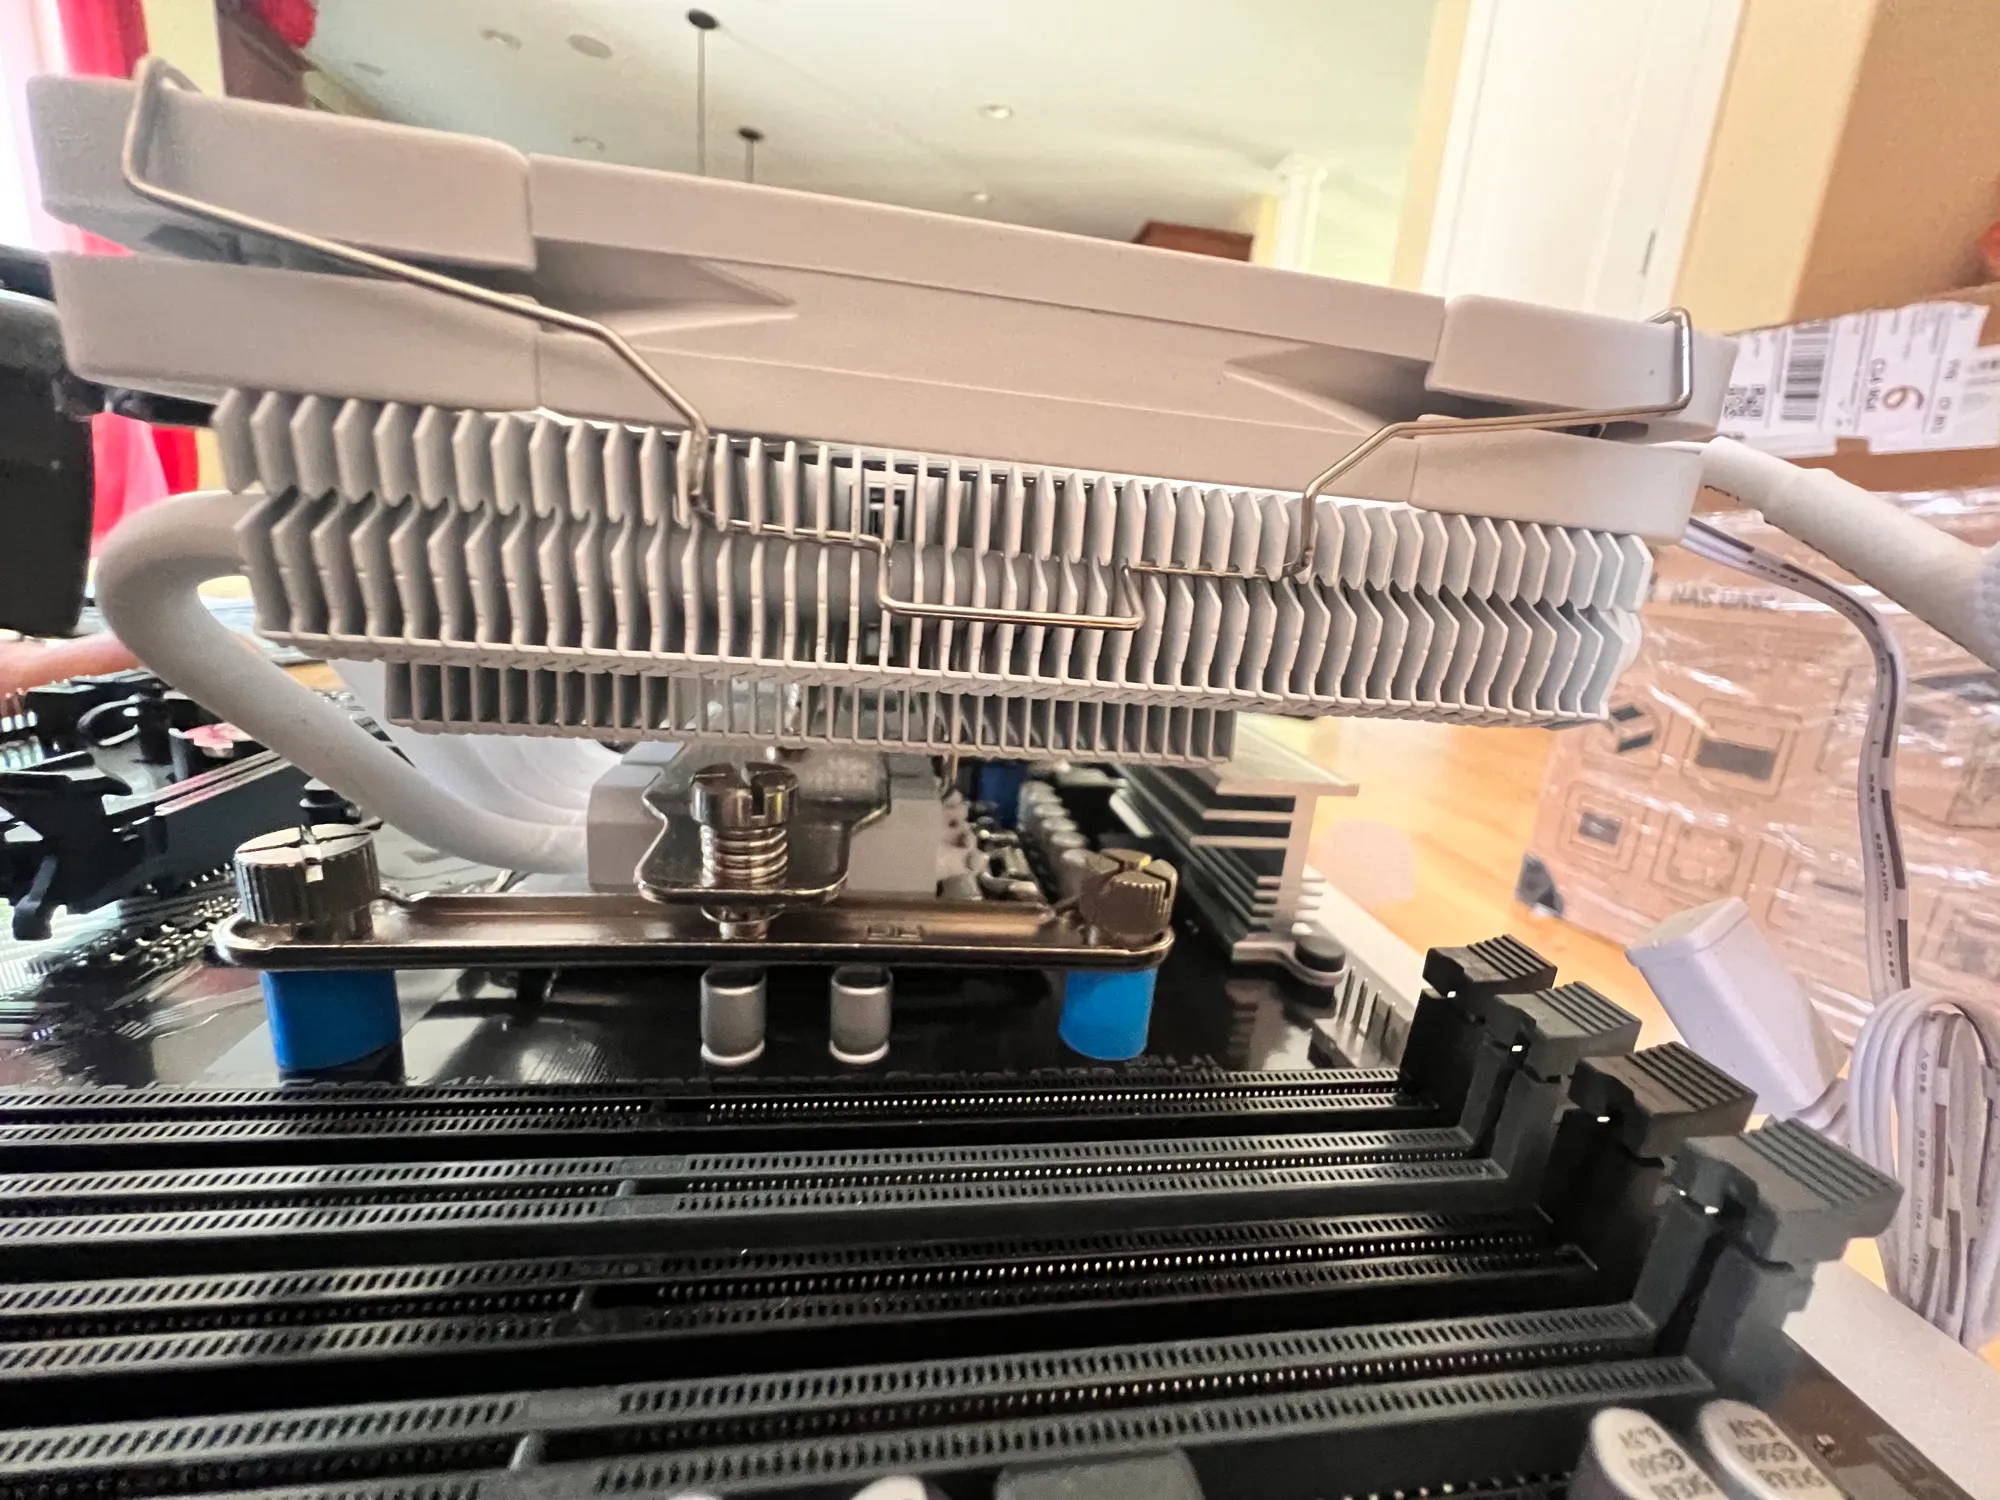
Tall heat spreaders would not survive that overhang; the Vipers clear it. It is worth deciding slot order and RAM height before buying a cooler this size, not after.
On-board storage
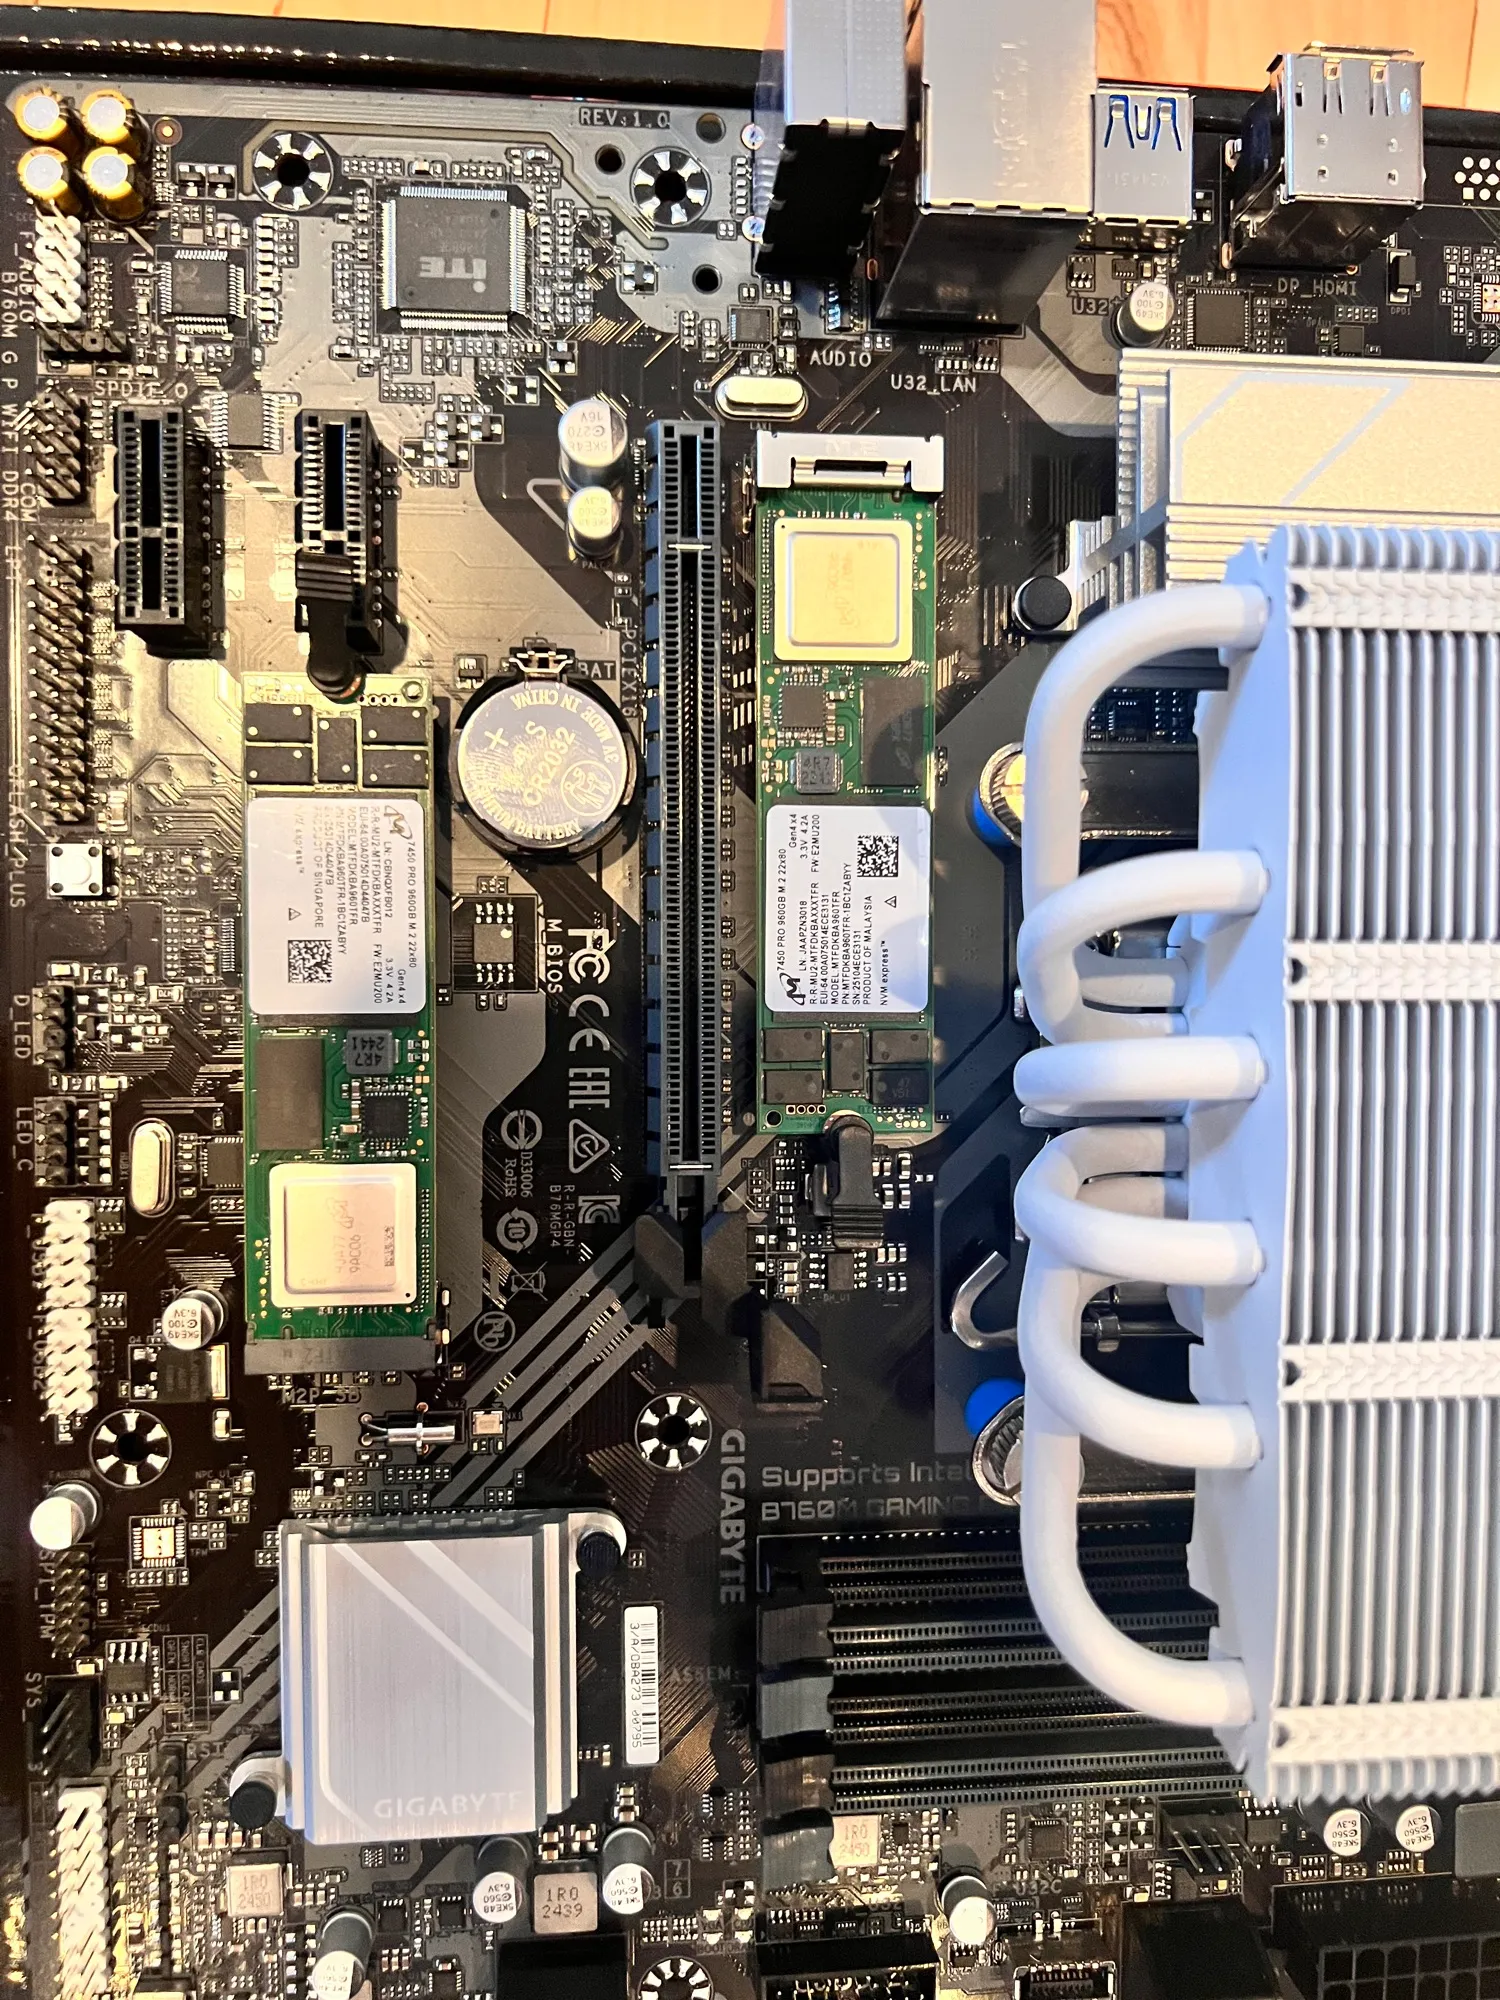
Both 960 GB drives went into the board’s two M.2 slots: no cables, no brackets, no drive cages. The board’s plate heatsinks went back over them once the cards were in.
Cards
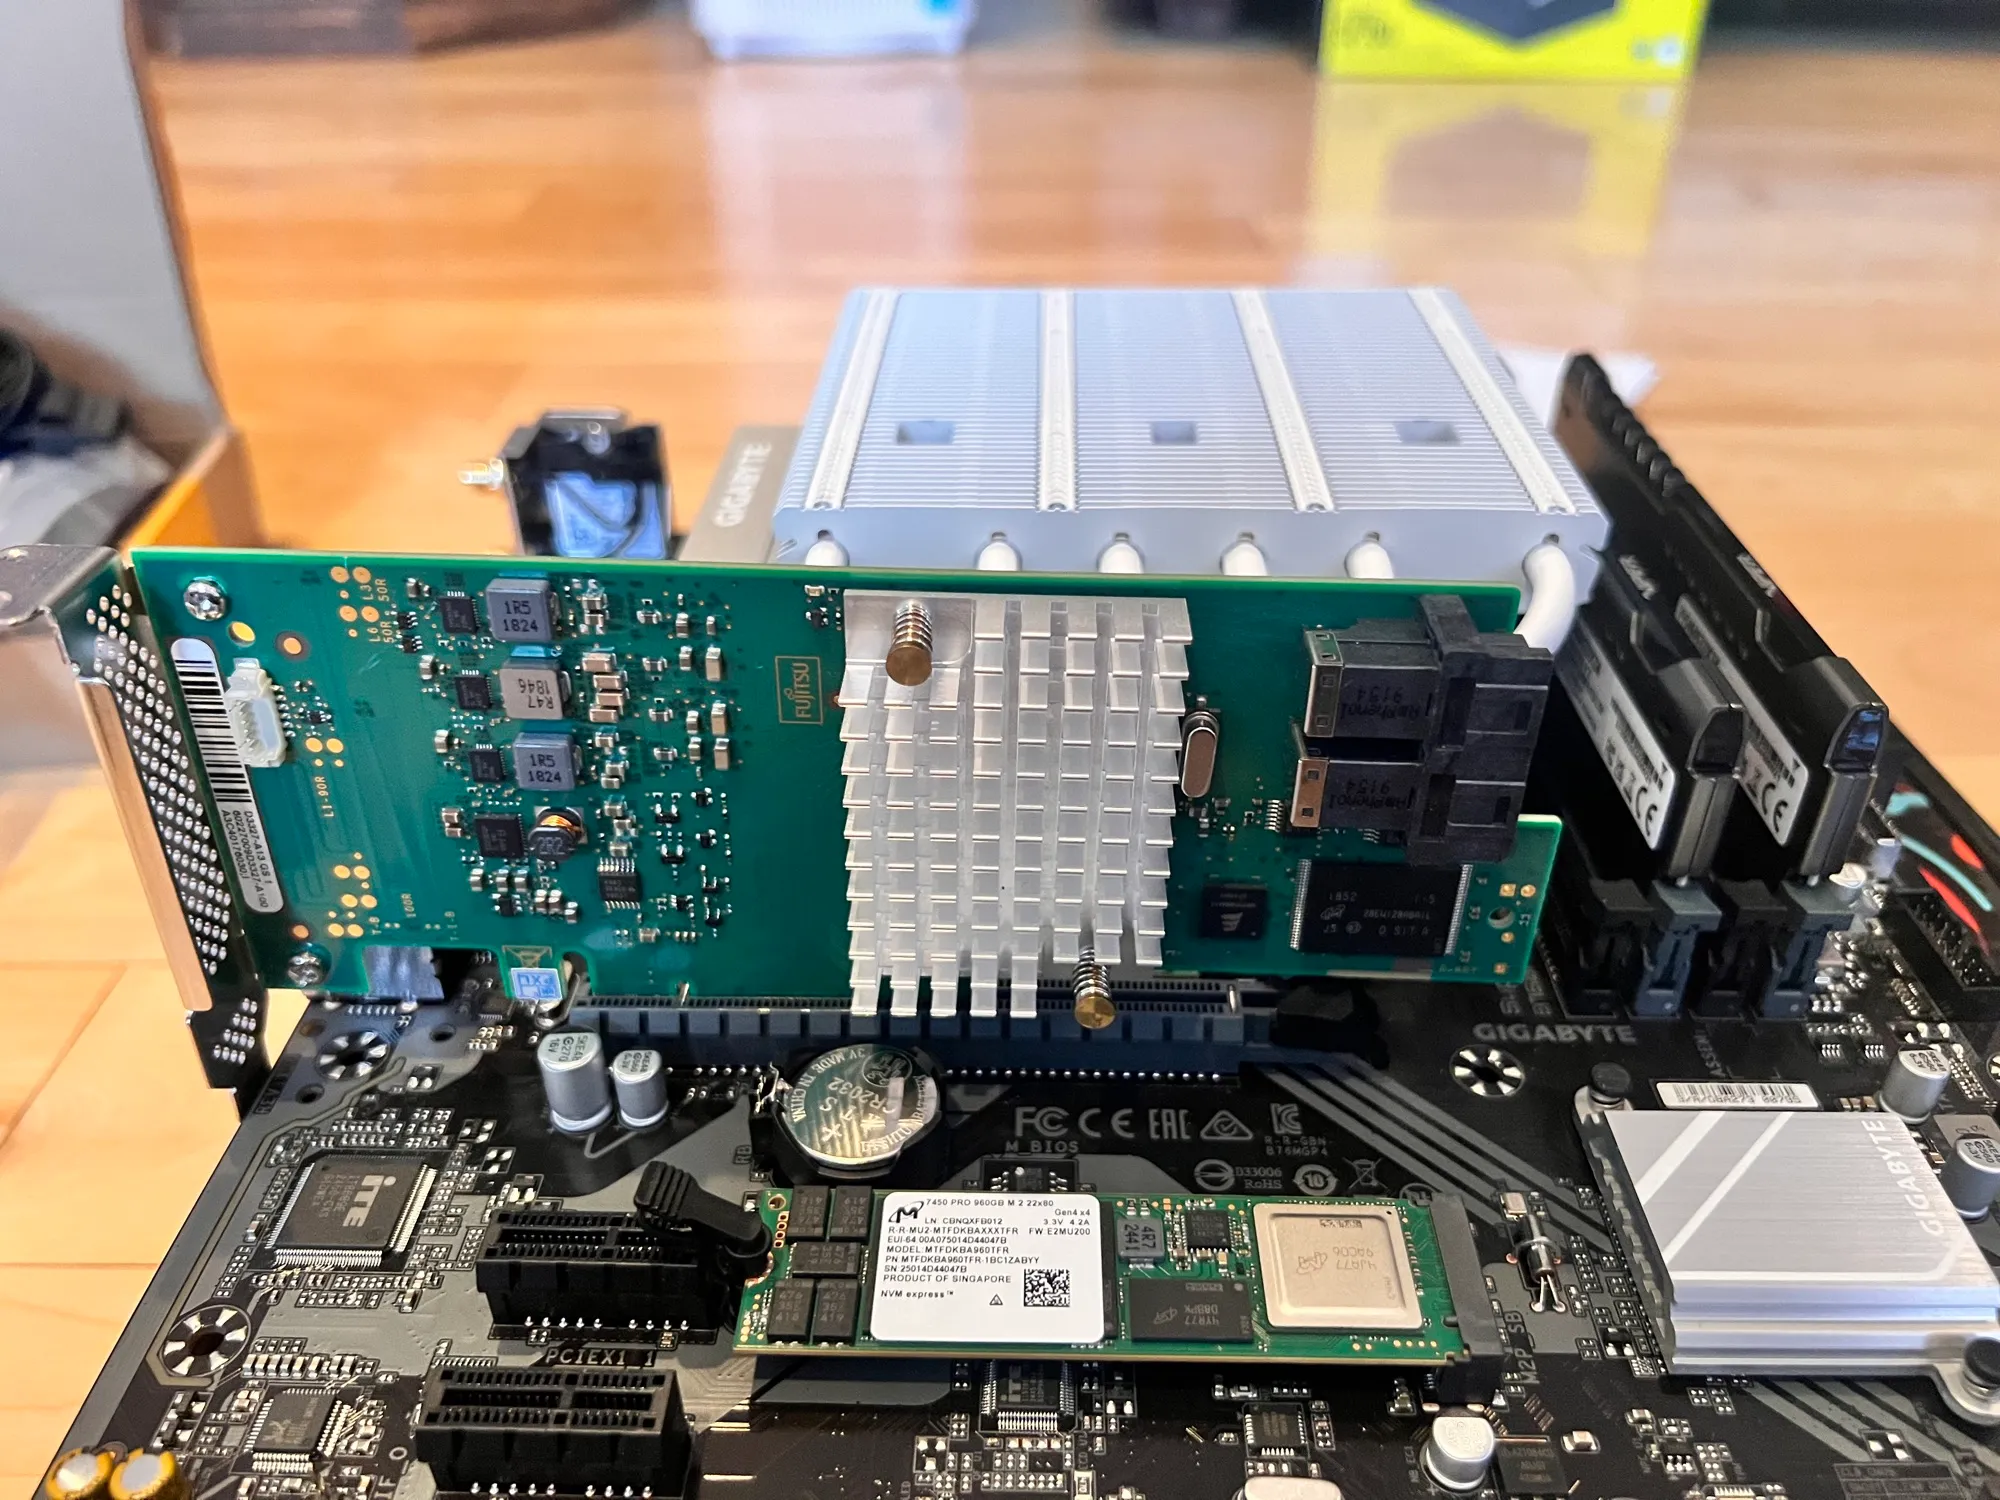
The SAS card went into the long slot. Eight drive ports over two mini-SAS connectors on a card the size of my palm: the whole storage expansion plan of this build, in one slot.
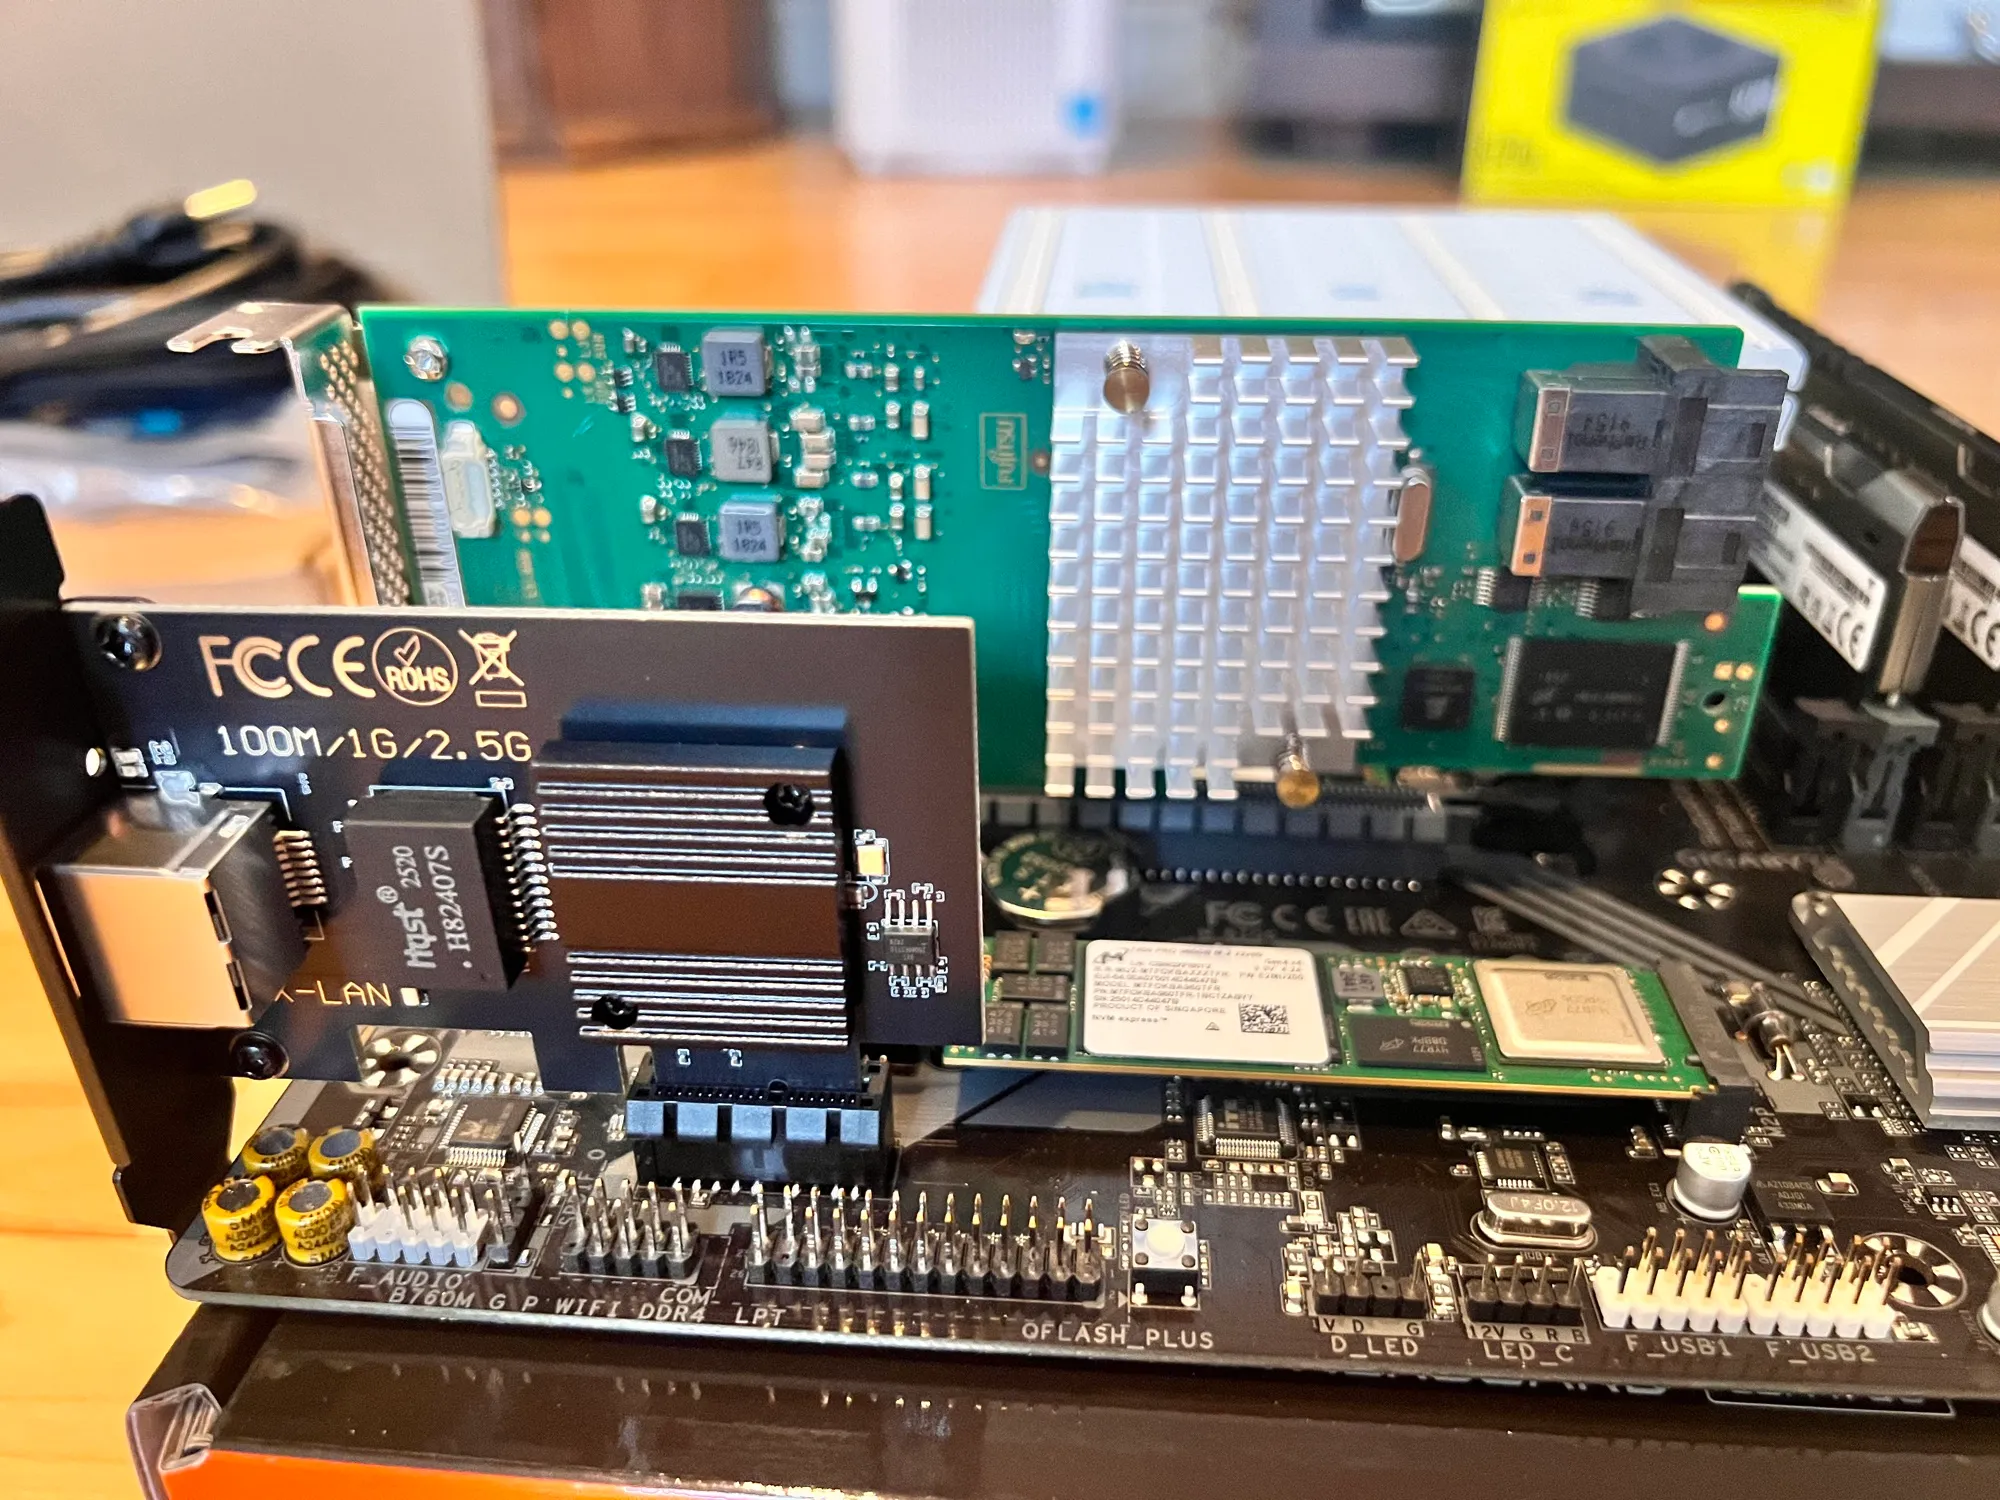
The I226-V took an x1 slot below the HBA. A 2.5 GbE NIC does not need more than a x1 lane, so the expensive slots stay free for things that do.
Into the case
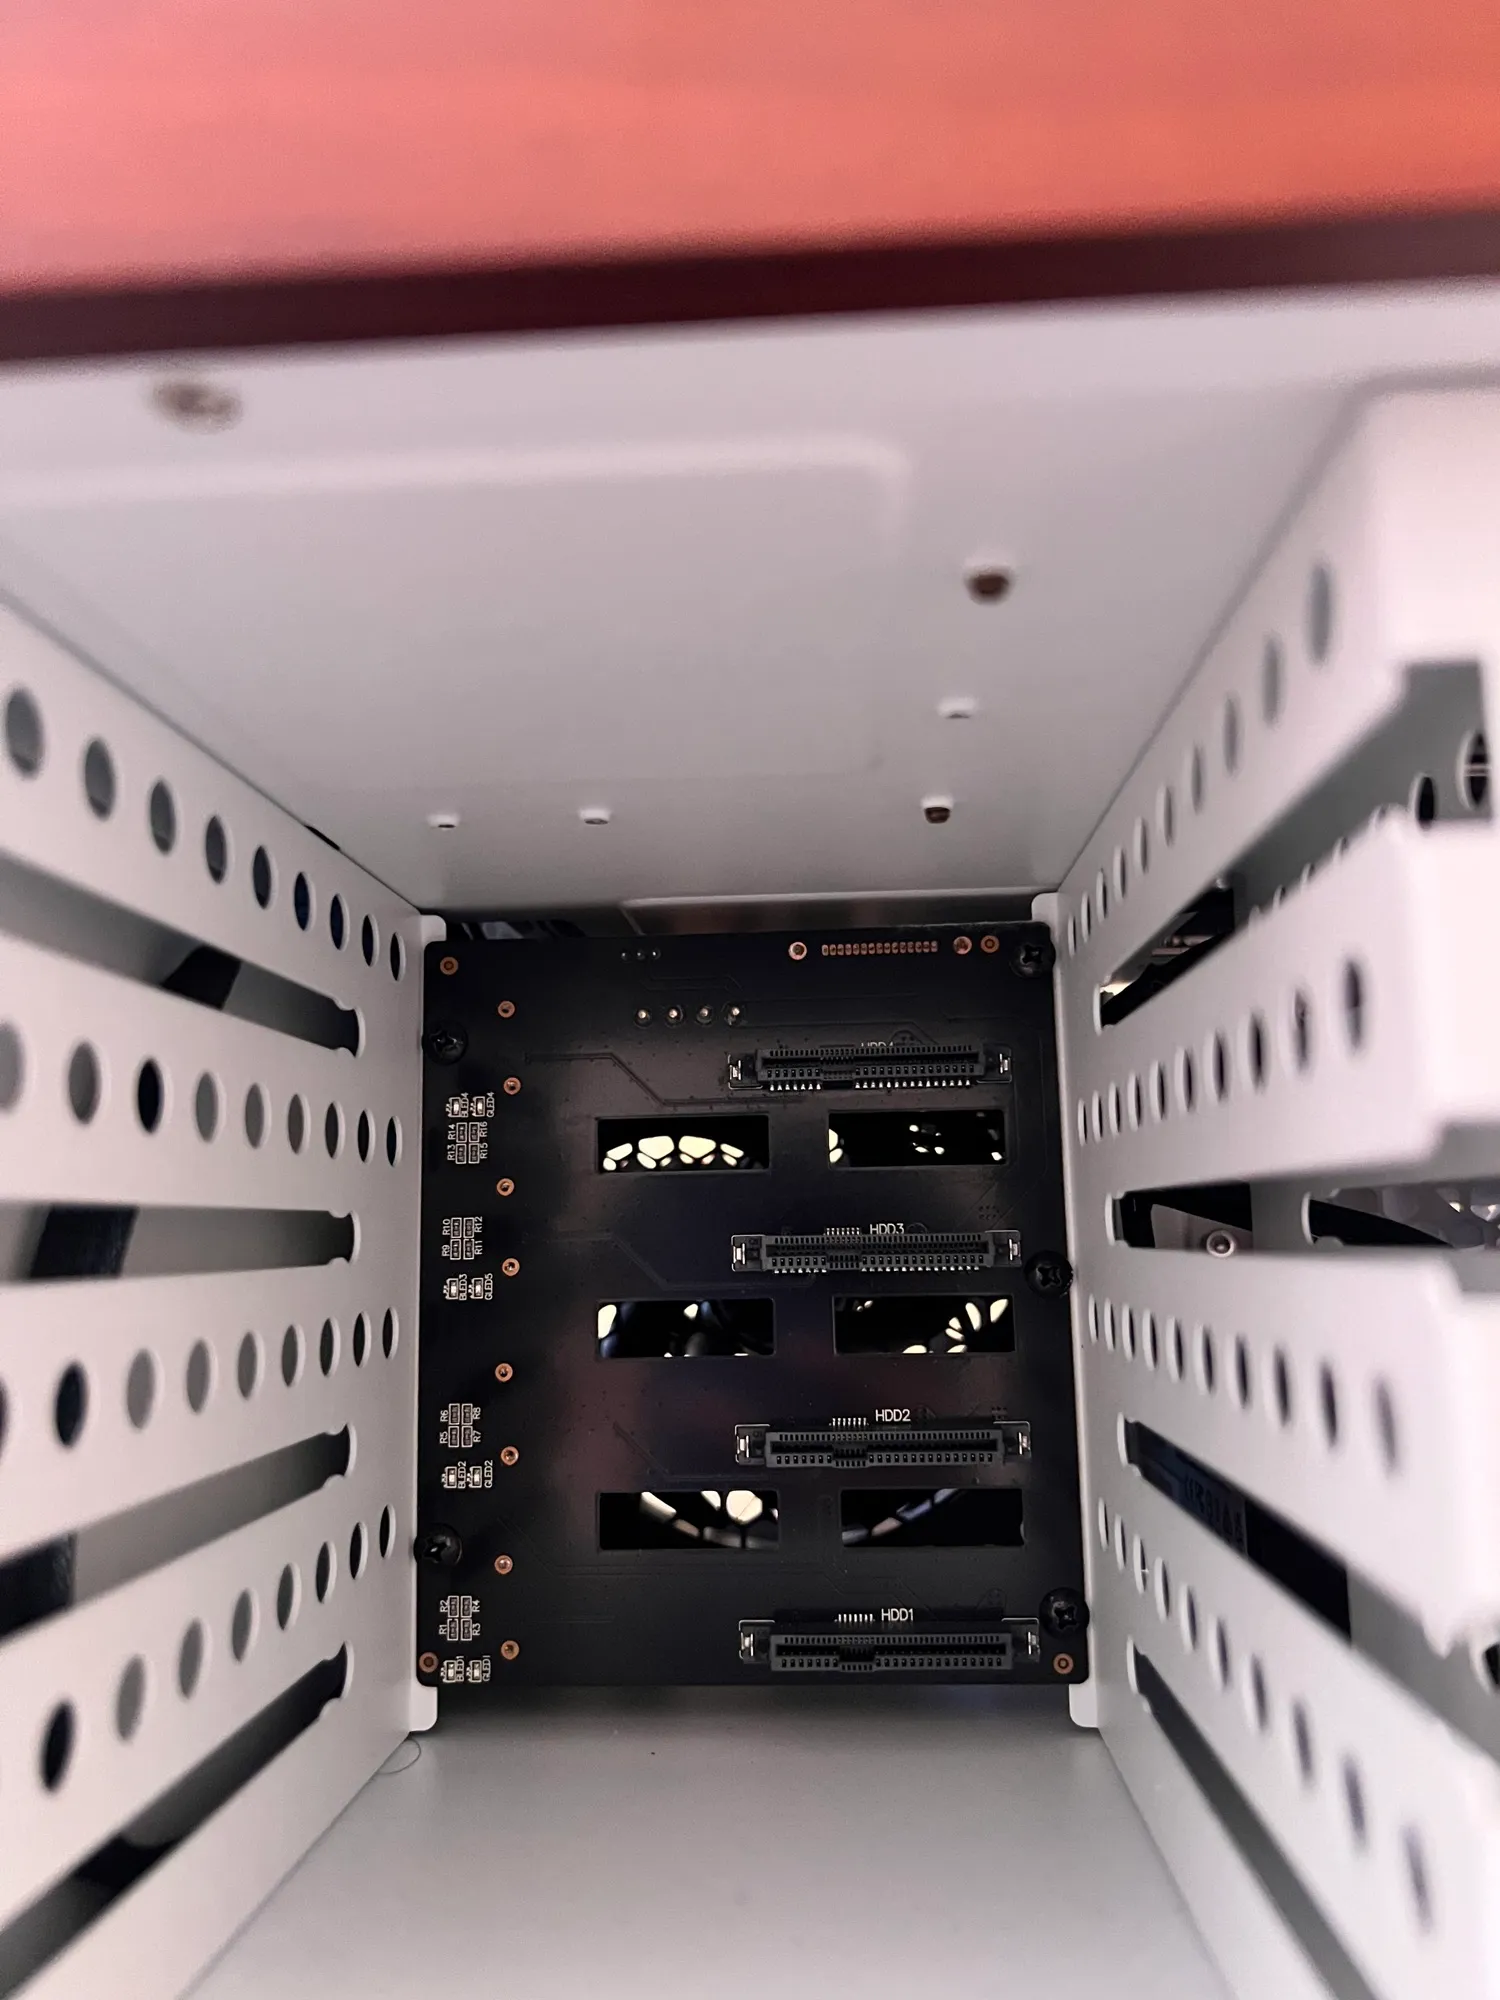
The N4’s backplane sits behind the hot-swap bays; the two SFF-8643 cables from the HBA run straight to it, and every bay becomes a port on the SAS card.
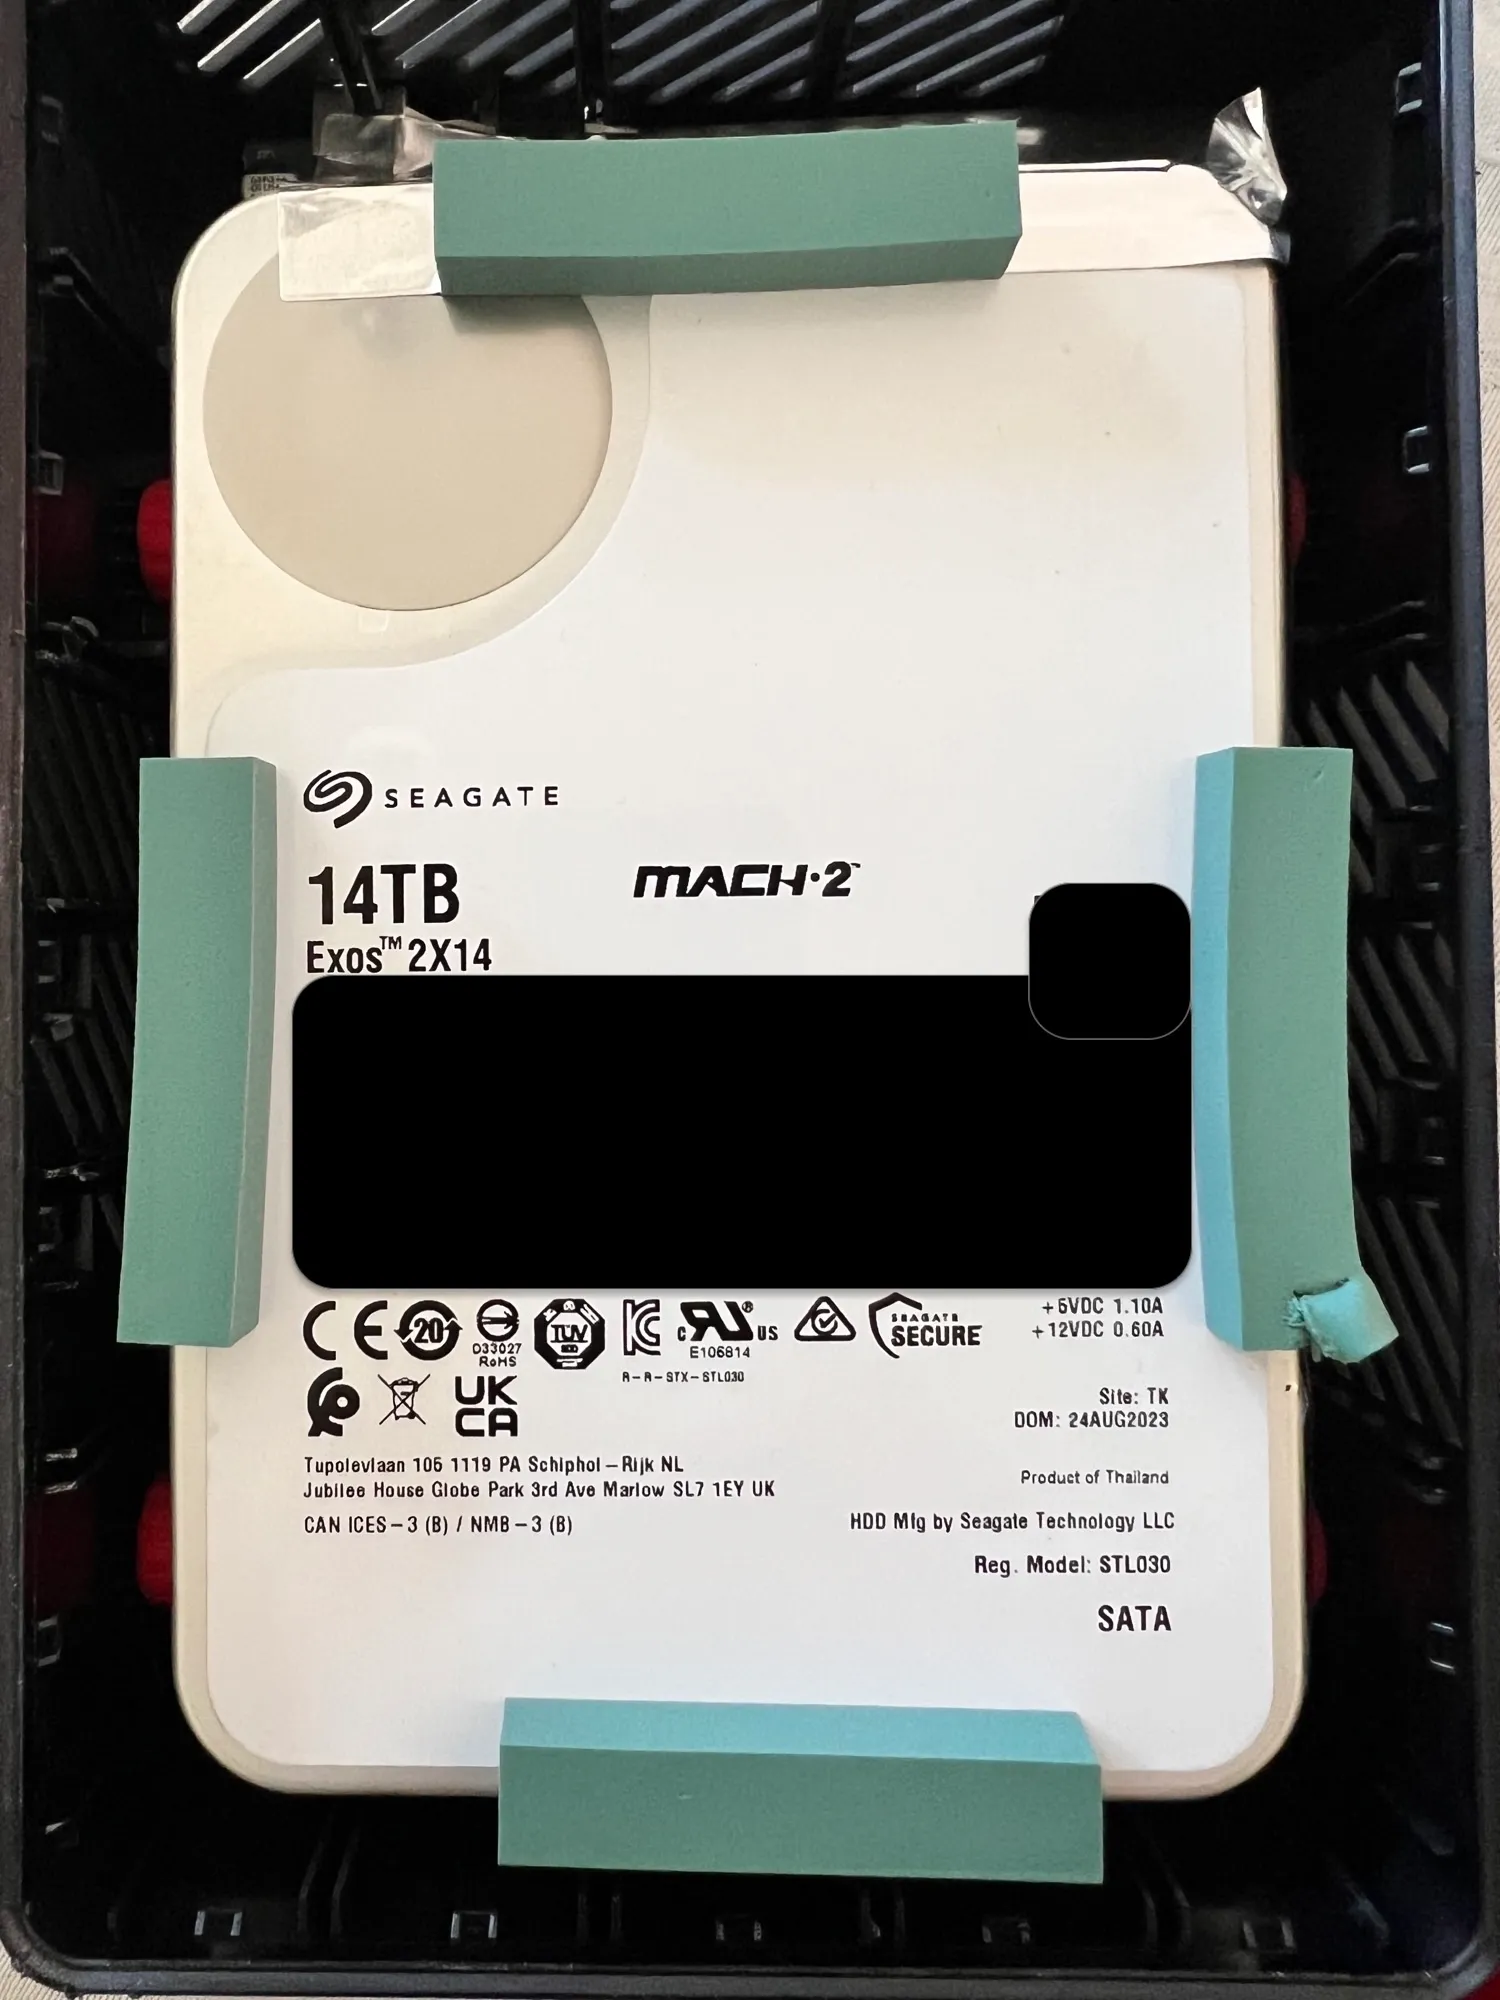
The 14 TB Exos went into a bay and the tray handle took care of the rest; the drive I had shucked myself dropped in exactly like the pictures promised.
The SF750 went in with only the cables the build uses: motherboard power, CPU power, backplane power, front-panel leads. In a case this size, fully modular is the only way the cabling comes out routed instead of crammed.
Cooling
The stock case airflow would have been fine on paper. Fine on paper is not what a box under the stairs needs; it needs to be inaudible in a hallway, and drive bays want moving air. So the case got a printed treatment:
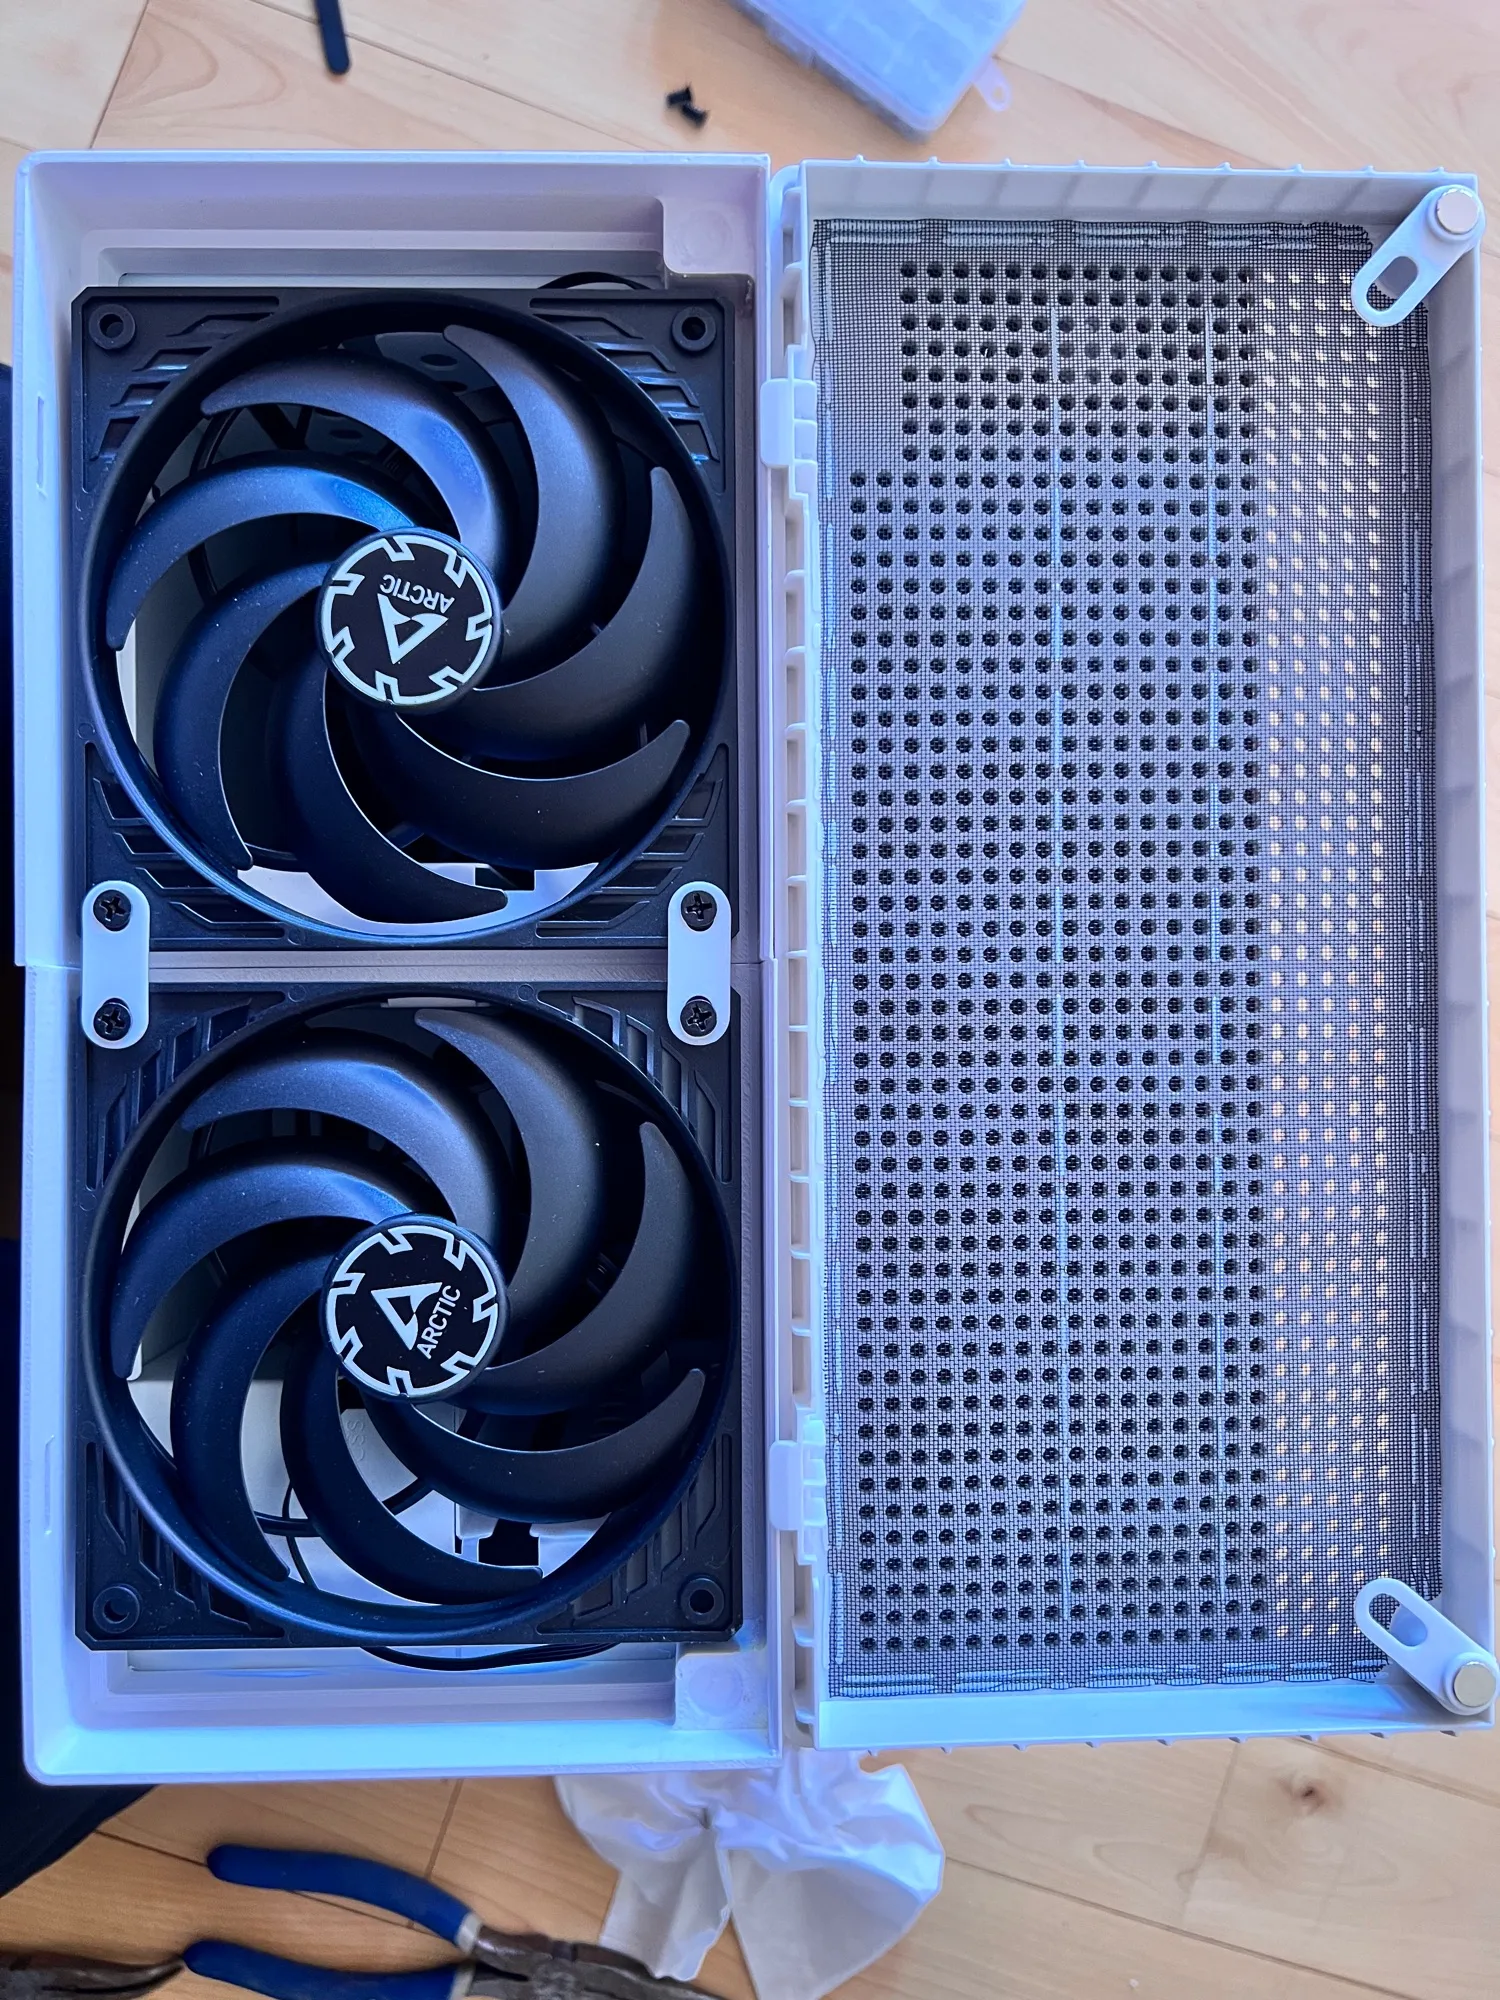
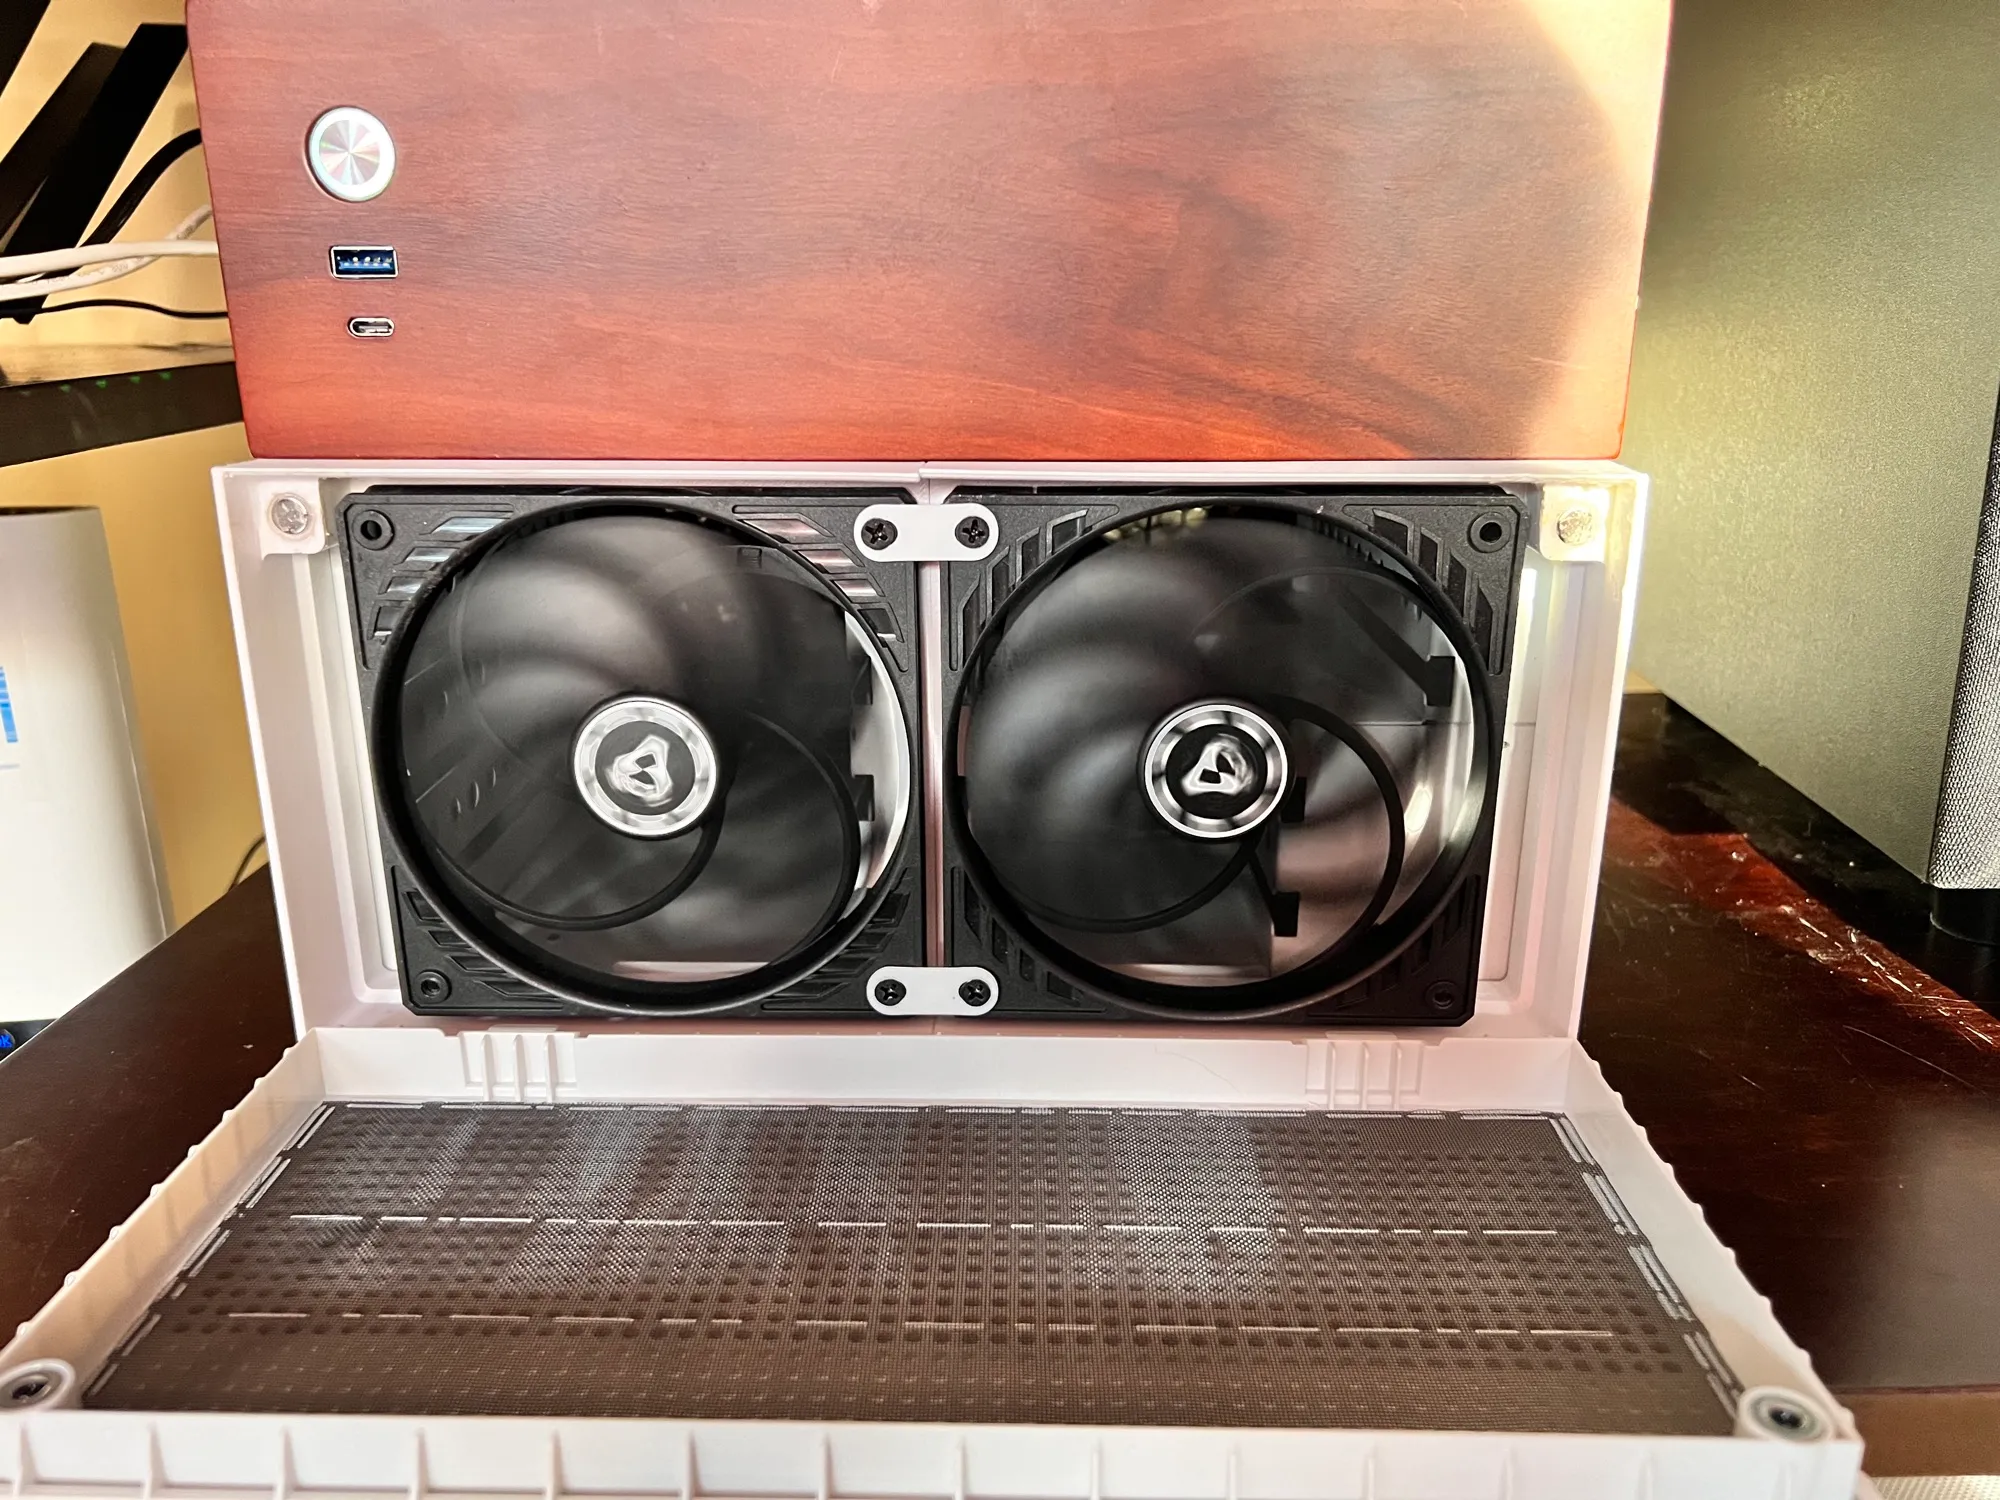
A printed frame extension on the front face holds a pair of Arctic 140 mm fans behind a magnetic mesh filter. The frame attaches with magnets and printed clips, so it pops off for cleaning instead of fighting me with screws.
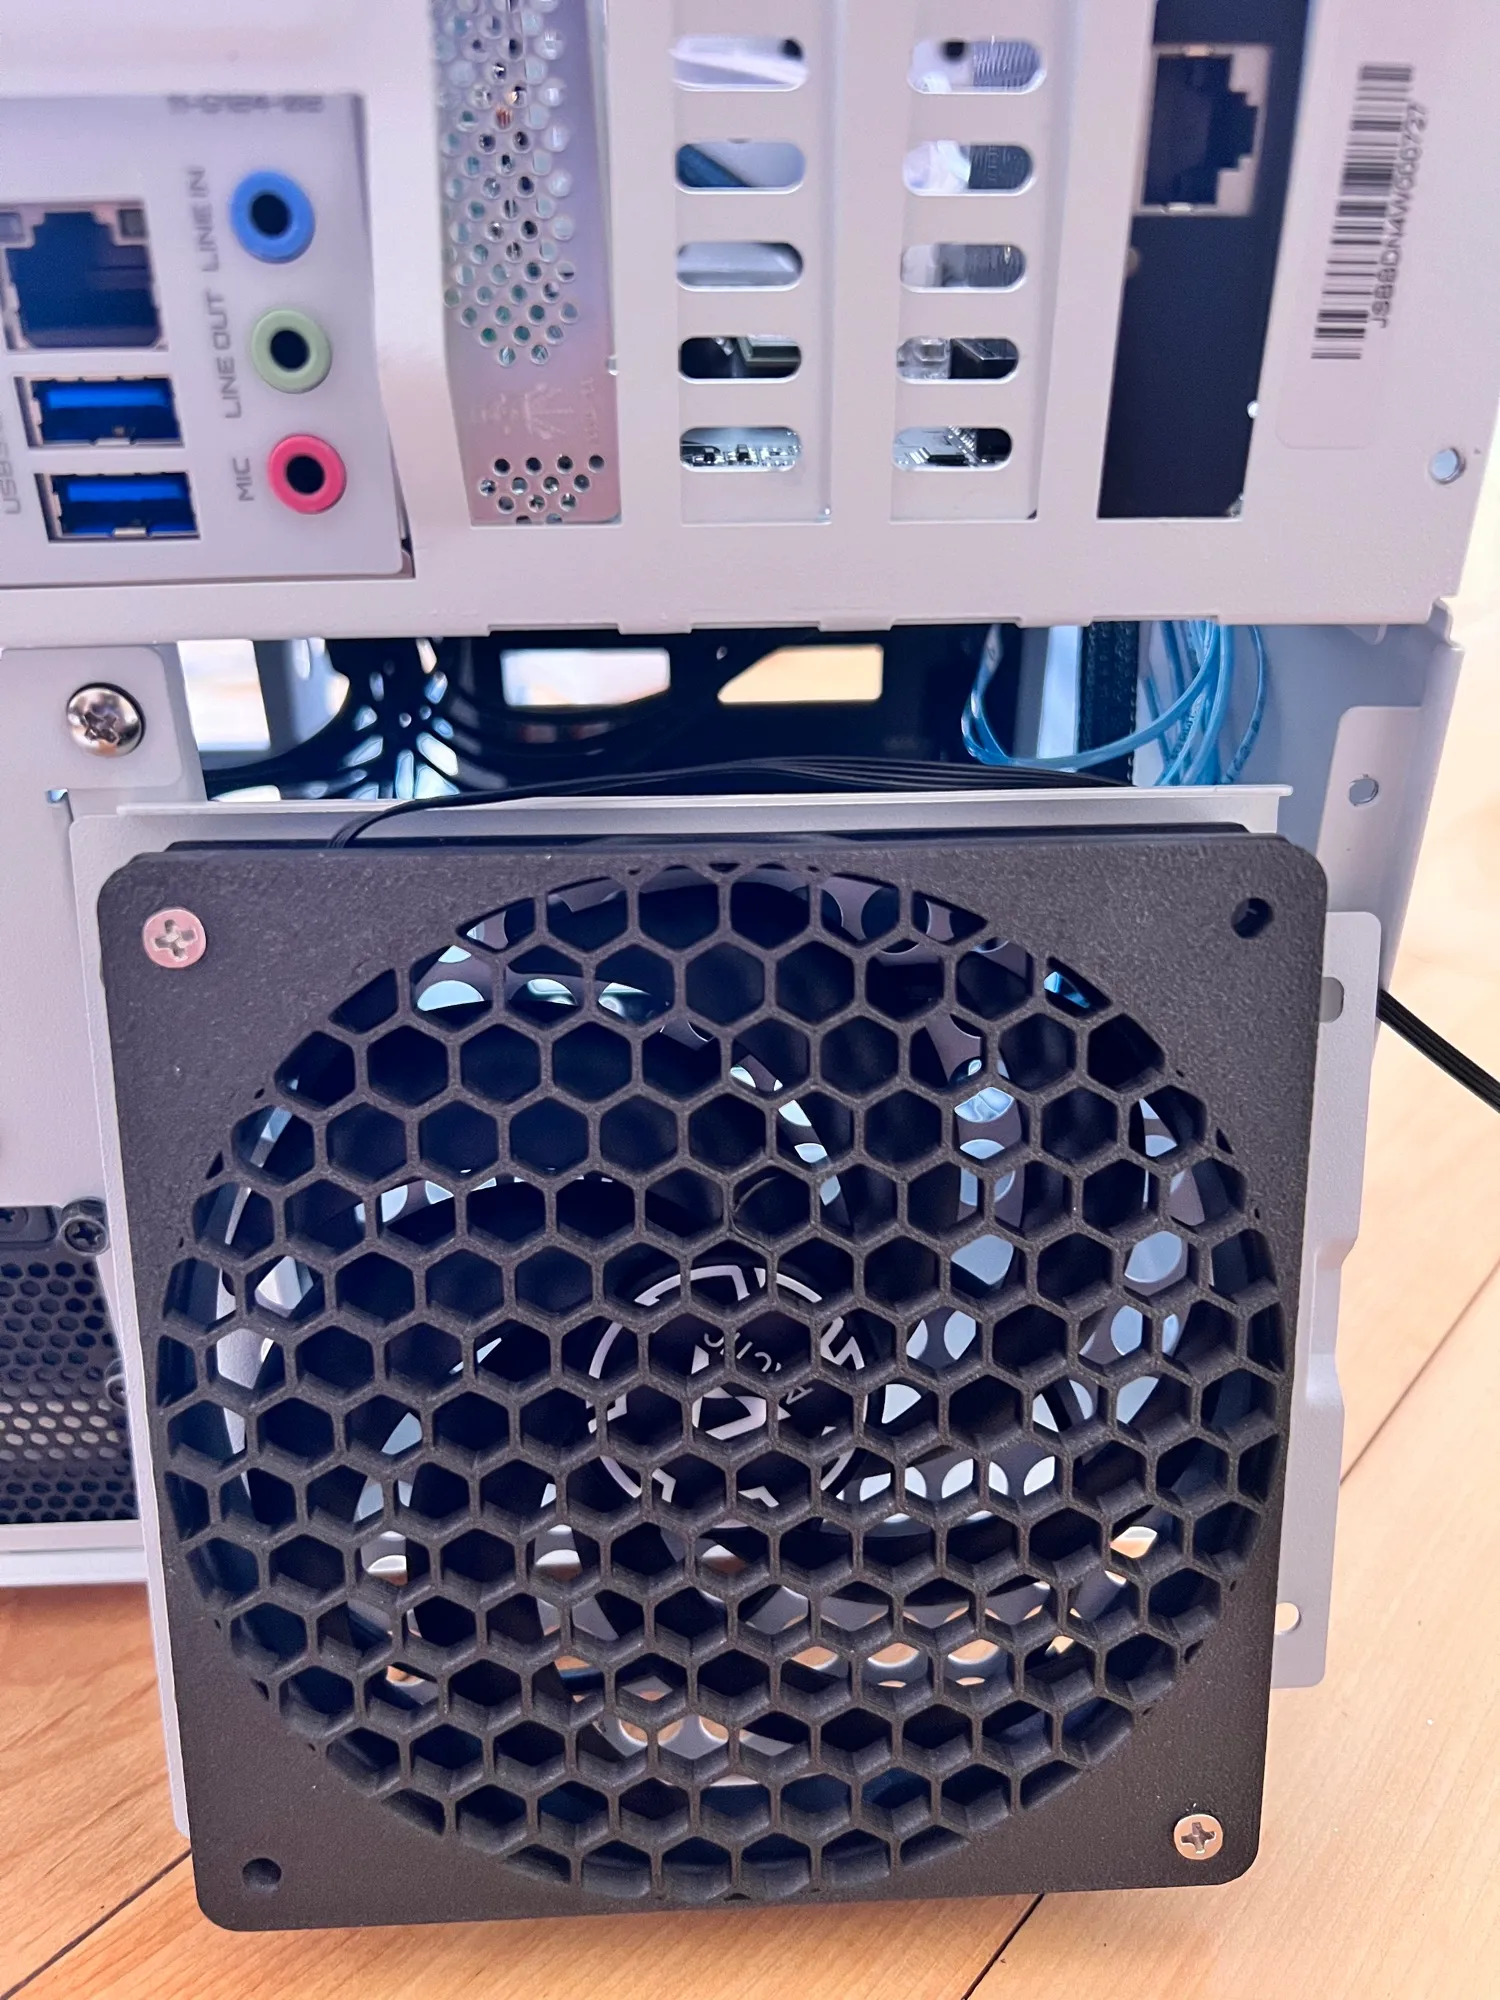
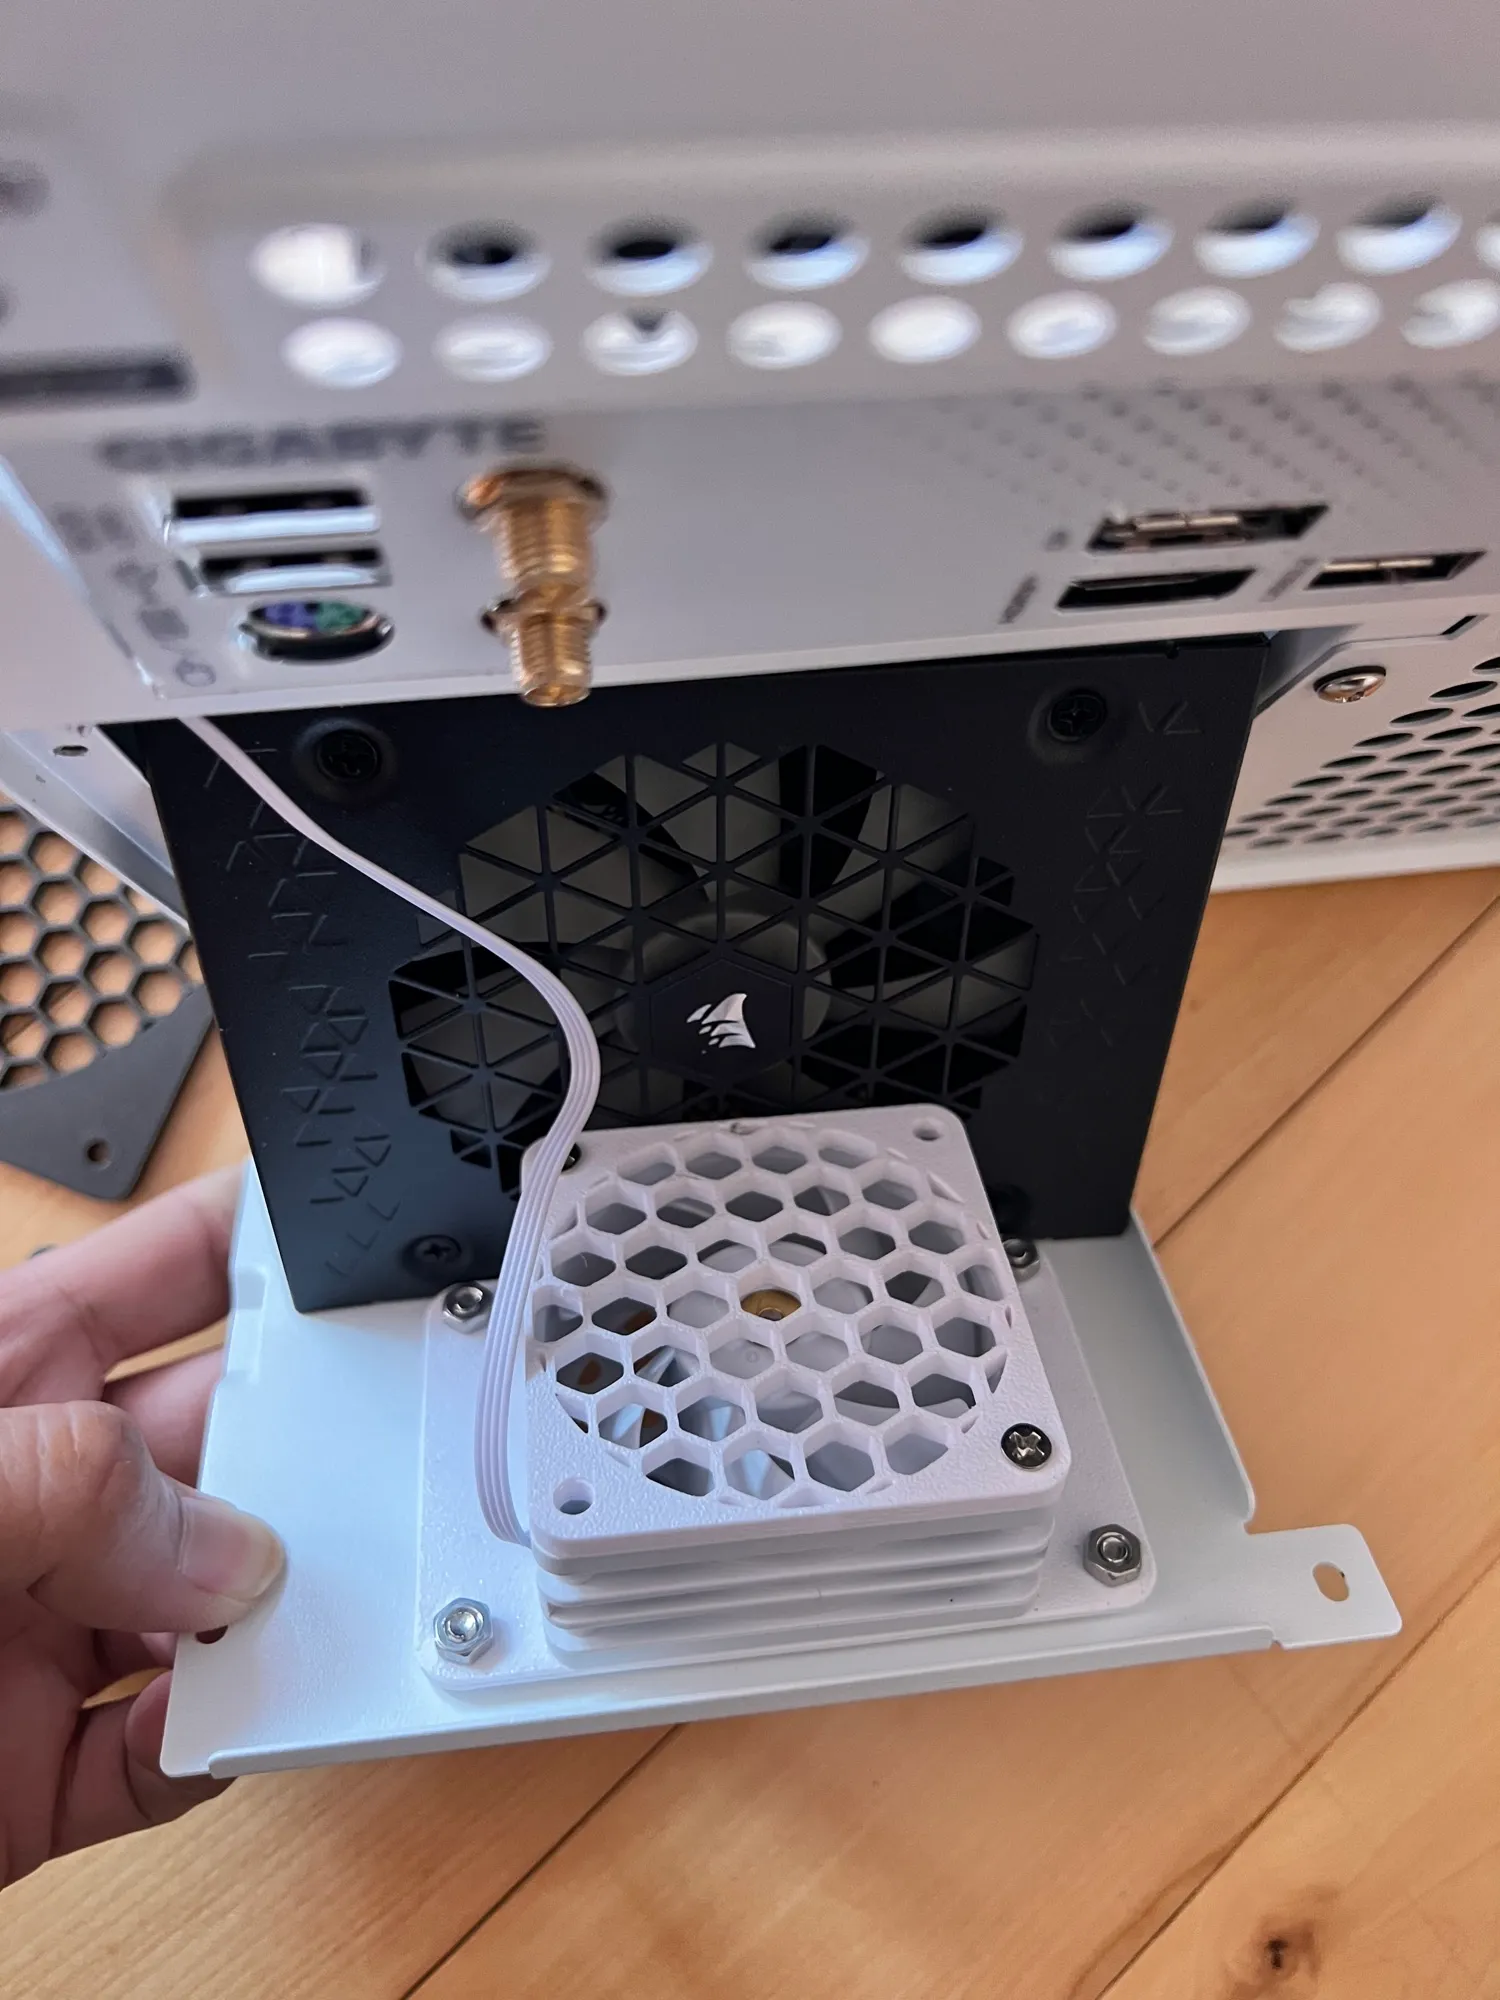
The rear fan wears a printed honeycomb grille, and a small supplemental fan on the PSU bracket keeps air moving there. Every fan in this case touches a printed part; the printer earned its corner of the house again. None of it is load-bearing engineering. It just makes this a box I open happily instead of one I avoid.
First boot
Proxmox VE 9 went on the NVMe pair as a ZFS mirror, and the two pools came up with ashift=12:
zpool create -o ashift=12 rpool mirror nvme0n1p3 nvme1n1p3
zpool create -o ashift=12 utank /dev/sda1The rpool mirror takes the OS and every guest root disk; utank is the bulk pool for media, photos and backups. From here the story continues in the design-notes post.
Closing
The list has no exotic parts: a CPU chosen for its power curve, data-center SSDs bought because they tell the truth about flushes, a shucked enterprise drive, and a NAS case that looks like furniture instead of a server. Everything else on top of it, the printed fan frame and the honeycomb grilles, exists because the printer was three steps away and zip ties were not the answer.
The box went under the stairs and disappeared into the household routine: quiet, hidden, and boring in exactly the way a machine that carries the family’s digital life should be. What the box does all day is the other half of the story: A single-box homelab on Proxmox VE 9.