How to setup and access to VM instances on Google Cloud Platform
Eliminates the needs for specialized hardware with resources from GCP Compute Engine
Overview#
Google Compute Engine is an Infrastructure as a Service (IaaS) component of the *Google Cloud Platform *(GCP) and aiming to provide specific hardware and utilize the cloud environment for development as well as production.
With Compute Engine, an instance could be generated with a couple of clicks with “a custom Machine Types optimized for your specific needs”. This is a great tool alongside with Docker, Kubernetes, etc. and is a game changer in the software industry and definitely a must-have tool. Now, let’s create a Virtual Machine !!
Prerequisite#
Follow the official documentations to setup your Google account ↗ and create a Google Cloud Platform Project ↗ with Billing Enabled ↗.
Google Free Tier introduces a 12 months, $300 trial for new user to learn the basics with several limitations ↗ which will not be an issue for our setup.
Well ! To be perfectly candid, it does depend on how much resources you want for your computer, so make sure to verify it.
For part 2 of this tutorial: “Gain access to your VM instance”, make sure your computer have a version of Python installed, preferably Python 2.7, for the best compatibility with the Software Development Kit from GCP.
If you have already created your own VM instance, well done ! Skip to the second part of the tutorial for instruction on how to gain access to the instance.
Configure VM step-by-step#
There will be two main steps:
-
Create and enable a VM on GCP Server
-
Install development tools for access using laptop’s terminal or simply access via web client
1. Create VM Instance: Image Option#
First, access the Cloud Console ↗ of your GCP Project and proceed to the Navigation menu (top-left corner) to tab Compute - Compute Engine. There will be a button to create the instance at the top bar.
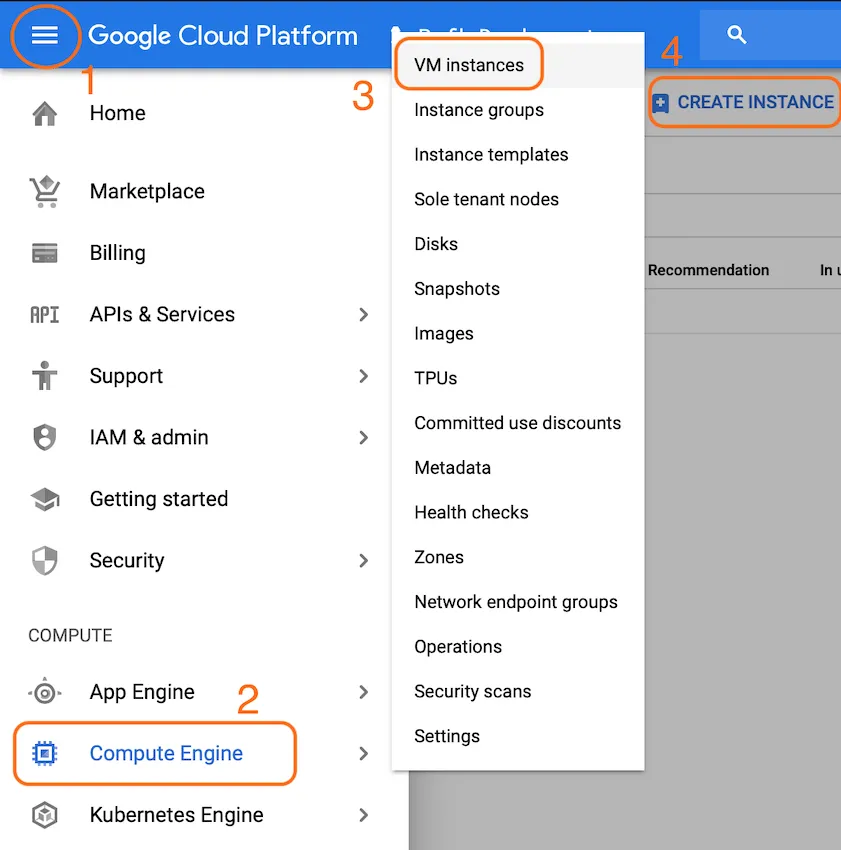 Four steps to navigate VM Instance Manager section
Now, it is advised that you left the settings as default in case you do not know what it does. The main settings for your instance are Name, Region, Specifications.
Also, once you got familiar with the process, do explore the Instance Template section for a more robust process of generating virtual machines from pre-defined sets of template.
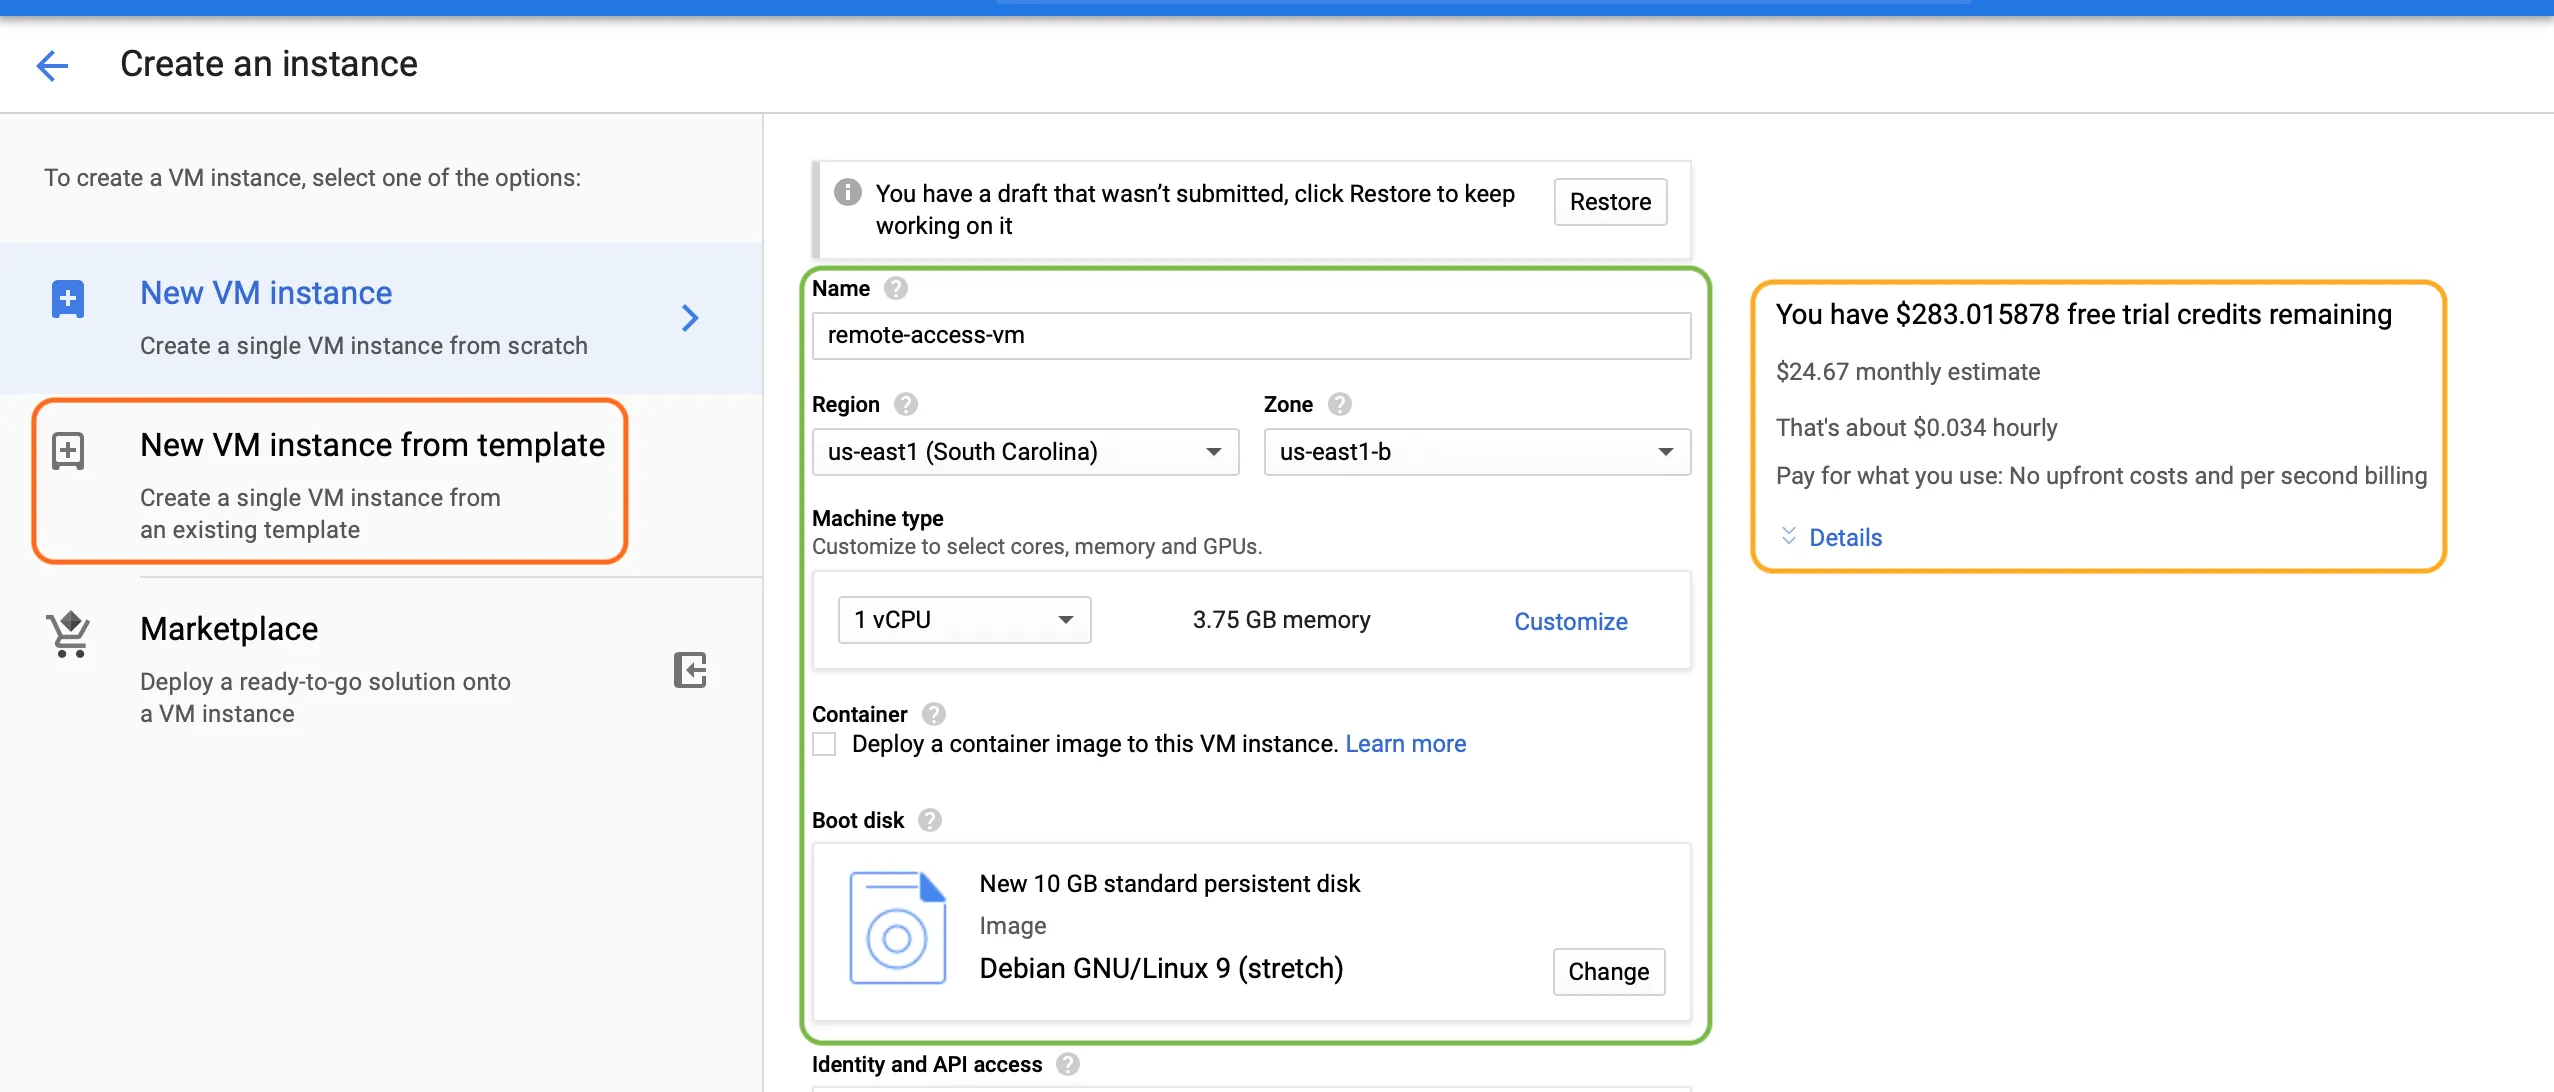 Boot Disk allows you to choose a variety of Operating System from Windows to Linux and even specific application image of SQL server built upon
Once hit create, half of our tutorial is done. The next part is to gain access into your VM instance.
2. Access VM instance: SSH#
The Easy Way: Web Client#
By now you have got the instance up and running, as in the same tab Compute Engine - VM instances. In column Connect, simply expand and chose the appropriate option to initiate a session with your instance.
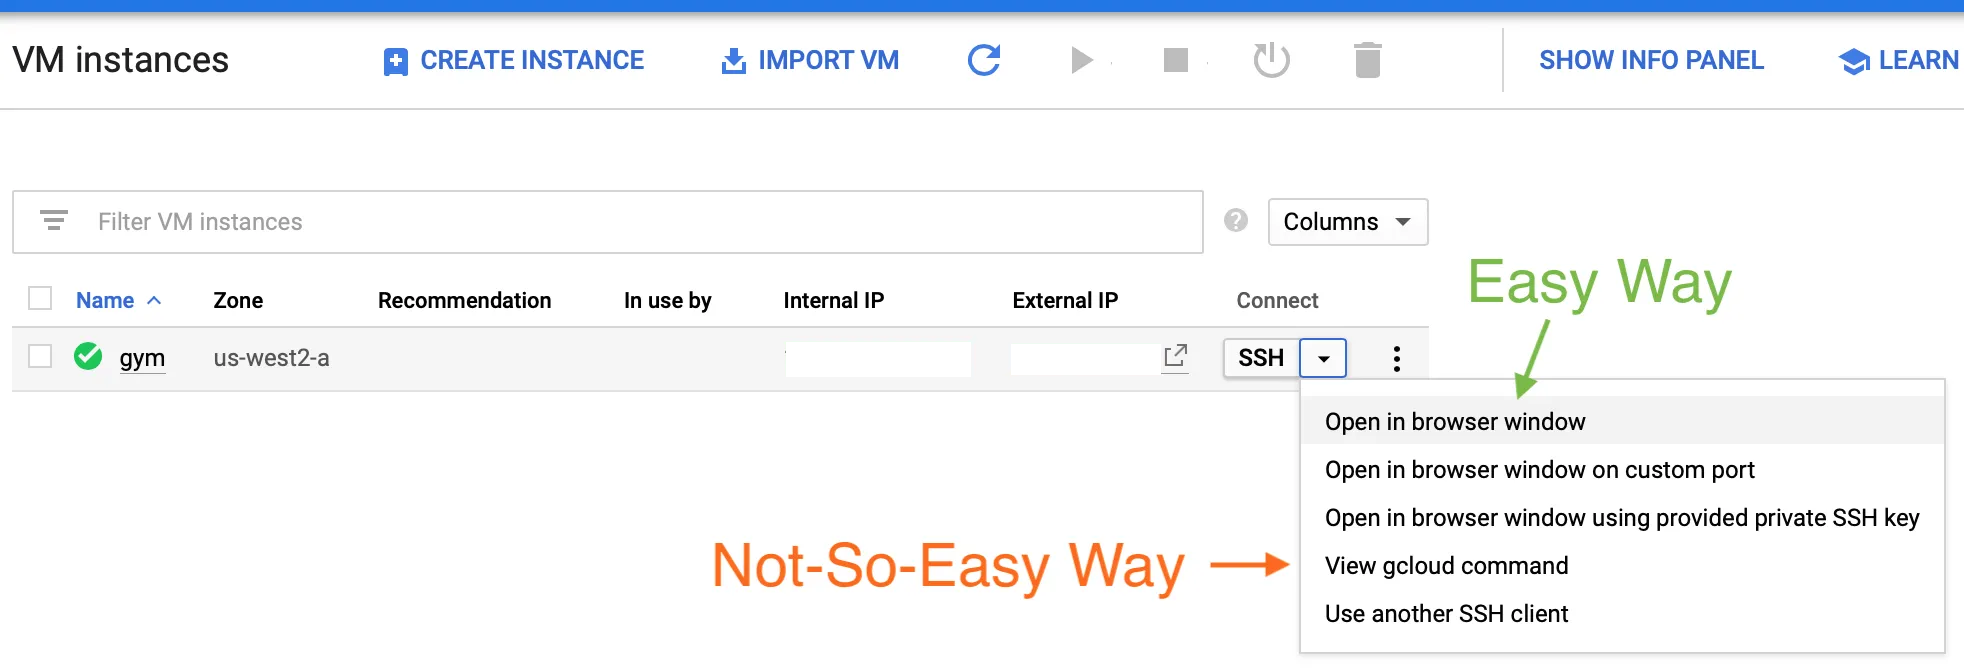 Enable Secure Shell connection using a browser window which result in a direct access to the command line of your instance
If you are looking for a way to gain access using your laptop terminal, keep scrolling to next part. Otherwise, that is the whole point of this tutorial, congratulation !
The Not-So-Easy Way: CLI#
For those of you want a CLI-based developing environment, the official SDK powered by Python from GCP is definitely a fine choice. Refer to the Prerequisite section at the beginning for Python installation requirements.
From that very page, download the package ↗ for macOS 64-bit (x86_64). Navigate to the downloaded location and extract the package. Ultimately, you can do this in terminal using the built-in tar command. Then execute the install Shell script.
tar -xvf google-cloud-sdk-241.0.0-darwin-x86_64.tar.gz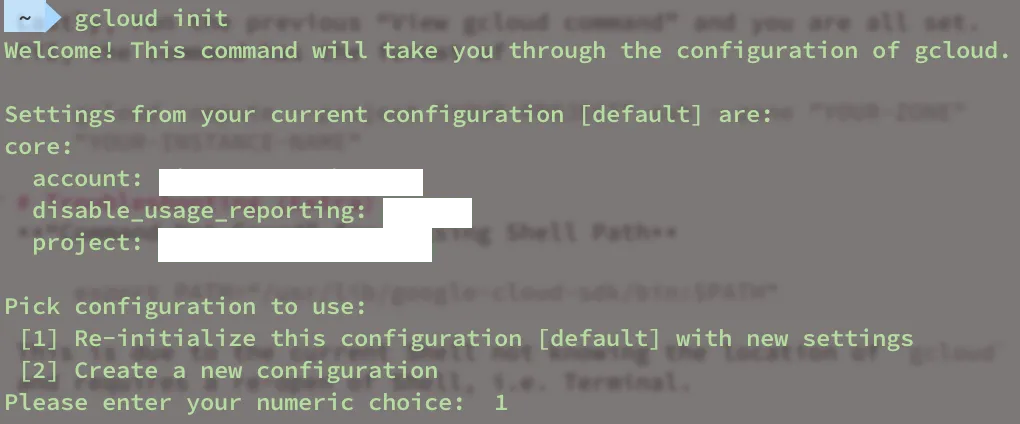
google-cloud-sdk/install.shAfter install successfully, execute the initialization command gcloud init and follow the instruction to set up account and verify the connection credential keys.
Re-initialize previous configuration, when you first initialize it will be different but will essentially defining these parameters
You are almost there !!! Run the previous “View gcloud command” to establish SSH connection to the VM instance and you are all set. FYI, the command has the format of
gcloud compute --project "YOUR-PROJECT" ssh --zone "YOUR-ZONE" "YOUR-INSTANCE-NAME"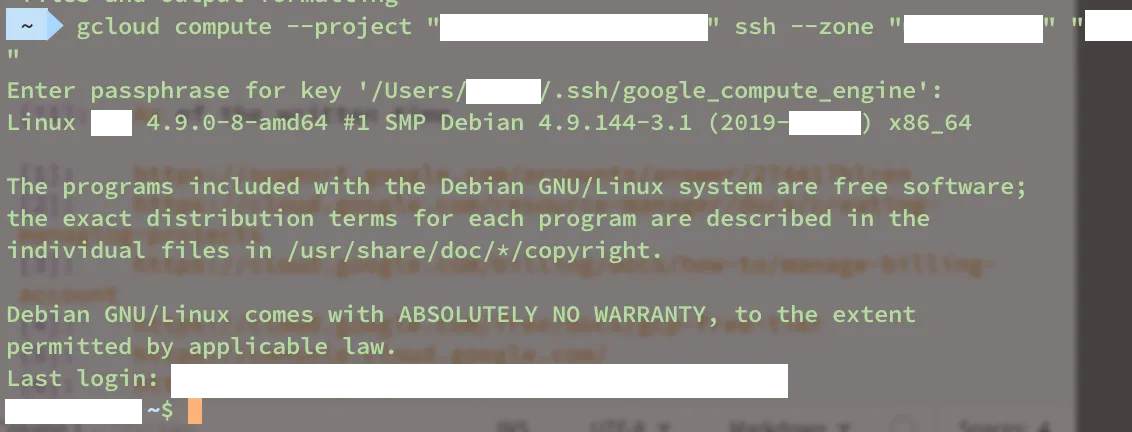 Successfully established SSH connection to my Debian VM instance. Now it’s your turn !!
Troubleshooting (Extra)#
“Command Not Found” for missing Shell Path
export PATH="/usr/lib/google-cloud-sdk/bin:$PATH"This is due to the current Shell not knowing the location of gcloud and requires a re-open of Shell, i.e. Terminal.
Relatively, looking into .bashrc/.zshrc for automatic loading shell command for gcloud if the issue was not completely resolved.
Lost/Forgot Credential keys
rm -rf /Users/YOUR-USER-NAME/.config/gcloud/*.dbThis attempts to delete the stored access_token and credentials local database. Run gcloud init to re-initialize and set up for new credential keys.